TheJessicat - Extractions of a Disoriented Mind
  • Entertainment
    • Film & Movies
    • International Artists
    • Live Concerts & Gigs
    • Local Artists
    • Music Festivals/Rave Parties
    • Nightlife/Parties
  • Food
    • American
    • Asian
    • Coffee joints/Cafe hopping
    • French
    • Fusion
    • Italian
    • Japanese
    • My Cookbook
    • Others/Fusion
  • Fashion
    • Body Art
    • Cosplay
    • Fashion Shows
  • Beauty
    • Hair
    • Makeup/Skincare
  • Travels
    • Thailand
    • The Australian Diaries
  • Health & Fitness
    • EatFitSlam: Clean Eating
    • GymJamSlam: Gym/Workouts
    • Sports
  • Current Affairs
Entertainment
    Film & Movies
    International Artists
    Live Concerts & Gigs
    Local Artists
    Music Festivals/Rave Parties
    Nightlife/Parties
Food
    American
    Asian
    Coffee joints/Cafe hopping
    French
    Fusion
    Italian
    Japanese
    My Cookbook
    Others/Fusion
Fashion
    Body Art
    Cosplay
    Fashion Shows
Beauty
    Hair
    Makeup/Skincare
Travels
    Thailand
    The Australian Diaries
Health & Fitness
    EatFitSlam: Clean Eating
    GymJamSlam: Gym/Workouts
    Sports
Current Affairs
TheJessicat - Extractions of a Disoriented Mind
  • Entertainment
    • Film & Movies
    • International Artists
    • Live Concerts & Gigs
    • Local Artists
    • Music Festivals/Rave Parties
    • Nightlife/Parties
  • Food
    • American
    • Asian
    • Coffee joints/Cafe hopping
    • French
    • Fusion
    • Italian
    • Japanese
    • My Cookbook
    • Others/Fusion
  • Fashion
    • Body Art
    • Cosplay
    • Fashion Shows
  • Beauty
    • Hair
    • Makeup/Skincare
  • Travels
    • Thailand
    • The Australian Diaries
  • Health & Fitness
    • EatFitSlam: Clean Eating
    • GymJamSlam: Gym/Workouts
    • Sports
  • Current Affairs

A pampering evening! Kneipp Hydrotherapy Jacuzzi Treatment + Traditional Chinese Deep Tissue Massage at Pink Passion

July 18, 2014 by thejessicat


One evening after a massive night out, I booked myself in for a much-needed massage and a jacuzzi session.

Thanks to Pink Passion The Signature Salon for inviting me over at just the perfect time, as I’d usually end up with muscle aches, sores and feeling like a walking zombie the morning after. (Yes, I party that hard)


It’s a pampering kind of day today!


I entered the familiar, cosy outlet and waited to be ushered into my spa room.


Needless to say, I was enchanted by its ambiance!

I could already foresee an invigorating experience the moment I stepped in.


The cascading fairy lights made the room so much prettier and relaxing!


The lovely ladies welcomed me before leaving me to my privacy to undress completely prior to the massage and Jacuzzi treatment. Wink

I was then told to take a dip in an adorable tub of bubbling lukewarm water and essential oils, also known as the Kneipp Hydrotherapy Jacuzzi treatment.


Let the soothing jets begin!


This Jacuzzi treatment is recommended before a massage session as it allows your masseuse to work on your tissues without much discomfort.

Heh. Hot/warm water in a bath spa does that to you! Big Smile

Did you know that the fall and rise of body temperature promotes relaxation to your muscles, body and improves blood circulation? 


Hi. Laughing


As the recommended time in this bath spa is 20 minutes, you can actually take a nap in it or just shut your eyes and let your mind drift to a faraway place.

Knowing me, I chose to take photos of the jacuzzi and selfies for my social media channels and blogging purposes! Teehee.


The bubbling force of the jets somewhat gave me a pre-massage session!


Propping my feet up. Ahhh.. this is the life!


Jacuzzi bath mugshot?


Fairy lights intrigue me. Oh, they certainly do. Oops


Okay, I’m gonna wrap up the selfie stream now!


After 20 minutes was up, I was told to take a warm rinse in the shower just before the massage session.

I was also provided a shower cap just in case I didn’t want to get my hair wet, and disposable underwear to wear throughout the massage.


A pretty corner of the spa room where I washed up.


Let the Deep Tissue Massage session begin! Ha Ha


My massage therapist turned on the fairy lights for me throughout my session.


But for blogging purposes, I requested for her to turn on the fluorescent lights back on for better lighting in my pictures. ‘Cos obviously, how on earth are you supposed to see the photos if they’re all dark? Surprised


Yes you will be required to be buck naked but rest assured,

you will be decently draped throughout Smile


My massage therapist was a Chinese national and oh goodness me, was she brilliant at her trade of Traditional Chinese Deep Tissue Massage or what!!?! SurprisedCool

She emphasizes mainly on your upper back but never fails to appease your limbs and other sections of your body as well.

I’m quite a regular at spa centers hence I do know a good massage when I experience one! This one definitely earns a spot in my good books.


This is perfect for muscular tension, discomfort,

sore muscles from sports or workouts and aches in general.


Traditional Chinese Deep Tissue massage targets the deep tissue structure of the fascia and muscles, referred to as the connective tissue.

I must say, this is extremely therapeutic in cases of stiff neck, tightness in lower back and soreness in the shoulders!

The way it works is by breaking down the adhesion, giving relief from pain, restoring mobility and releases the built-up toxins by loosening muscle tension.


I actually dozed off at one point LOLOL. 


 Before I knew it, she lightly tapped me on my shoulder and proceeded to turn me over on my back for the frontal massage.


 She began with my head and scalp Embarassed


As she continued towards my arms, core and lower body, she hit all the right trigger points, deep tissues and took away all my tension!

The pressure was just right as well; with just enough strength to untangle my very-tangled stressed self LOL.


I actually insisted for the most intense/strongest one.Ahh!

Not sure if you enjoy being in ‘pain’ like I do but you can always request for a lighter pressure anytime! 


An hour later, I felt relaxed and comforted.  Still Dreaming

Admittedly, I did feel a tad sore the next day but hey, I asked for such immense  massage strength I believe was enough to last me several months!

Oh and remember, H20 is your best friend! Smile1

Being properly hydrated before you go for this massage is highly recommended and drinking plenty of water after the session is encouraged. With toxins released, blood and oxygen can circulate more efficiently around your system.


 Thank you, Pink Passion for a splendid day of pampering and relaxation!


Want to experience a day like mine too? Big Smile

Specially for my readers, you can use the voucher below to get the Kneipp Hydrotherapy Jacuzzi treatment + Traditional Chinese Deep Tissue Massage at only RM58 instead of RM138. Just mention ‘TheJessicat’!

Have a marvelous time! Ha Ha


———————————————————————————

For more information on this session at Pink Passion or how you can make an appointment:

Contact them via this phone number: 03-7805 7285

Visit their outlet at this address:

No. 37-1, Jalan PJU 1/3C, Sunway Mas Commercial Centre,
47301 Petaling Jaya, Malaysia

Log on to their official website: www.pinkpassion.com.my

LIKE them on Facebook at: Pink Passion The Signature Salon

Share:

MESMERIZE away with a shade of grey & purple – an Ivilens’ contact lens series by Charmé!

June 19, 2014 by thejessicat


We all know the cliche of how one’s eyes are the windows to their soul.

This is a story about how a sparkle in a girl’s eyes led the love of her life right to her doorstep. As they say, a fairytale wedding ensued and they lived happily ever after.


I’m joking, obviously… and it’s not the sparkle in her eyes.

Sorry to burst your bubble, boys. It’s just what contact lens can do to girls’ eyes these days. Chances are, you’re not looking into her soul; you’re just staring directly into her contact lens. 😛 😛 😛

Nevertheless, they DO undeniably, give the ladies a very pretty twinkle in their eyes. Let’s face it. We think it’s pretty, and so do you.


Introducing the MESMERIZE series of contact lenses by Charmé.

Thanks Ivilens!


This is actually a sequel to my previous blog post about the ECLIPSE series of contact lenses in grey and brown from Ivilens.

Check out how ECLIPSE looks on me – here

Today, I will be featuring MESMERIZE, another series of contact lenses under the Charmé brand as well.


This is what you will see upon opening the tightly-sealed packaging.


 A close look at how it looks like when worn.

Trying to open my eyes as wide as possible so you can see it properly!


I must say though, it doesn’t have the iris enlargement effect like the ECLIPSE series I wrote about previously.

But my personal preference would be the MESMERIZE series simply because the colours and design suits me a lot better!


Right? These are really my favorite!


 A closer look.

(Told you I have hanging eyeballs if I open my eyes too wide apart HAHA!)


Say goodbye to dry eyes!

After using Charmé, I’ve never needed to bring my eye drops along anymore! 😀 😀


Although it is discouraged, I have admittedly crashed into bed and fell asleep with my contact lenses still on. But they didn’t hurt the next morning! (Please don’t do this! If you get too drunk however, that is an exception 😛 )

One of the best parts of MESMERIZE is the variety of colours available!


MESMERIZE also comes in more exciting colours like blue, green and purple! That’s of course if you want to stray away from common colours like black, grey or brown.

Trust me, the colours won’t make you look like you’ve just exited a cosplay convention or jumped out from an anime tv series.

Let me show you! Ha Ha


 MESMERIZE in purple. See? It’s pretty mild. Not to worry!


 It’s only more obvious under DIRECT light (sunlight or artificial light)


Definitely less obvious at night.


I usually only wear my contact lenses whenever I attend all those events and parties you see me at. Sometimes I wished I actually needed contact lenses to see so I can wear them more often (because I’m usually very lazy to put them on and take them off!)

Uh-huh. You guessed right. Almost-perfect 20-20 vision! Except for the astigmatism. Bleh. Hit with Brick


Under different lighting.


Generally, wearing contact lenses can pose a slight discomfort especially when you wear them for long hours. 🙁

But thankfully, the Charmé contact lens series are very comfortable and so far, I’ve not encountered any problems wearing them the entire night.


Thanks Ivilens for the wonderful pairs of Charmé contact lenses! Definitely made it to my must-recommend list of favorite items.

Would love to see how the brown or green ones look on me this time 😀


——————————————————————————-

For more information on Charmé by Ivilens and how you can get them,

Log on to their official website at: www.ivilens.com

LIKE them on Facebook at: fb.com/ivilens

Share:

Before & After! A fun makeover with LUNASOL’s 2014 Spring Makeup Collection by Kanebo Cosmetics Malaysia.

June 3, 2014 by thejessicat


Palettes and palettes of shades everywhere!

It’s almost like a kaleidoscope of shimmery colours and pastel hues.


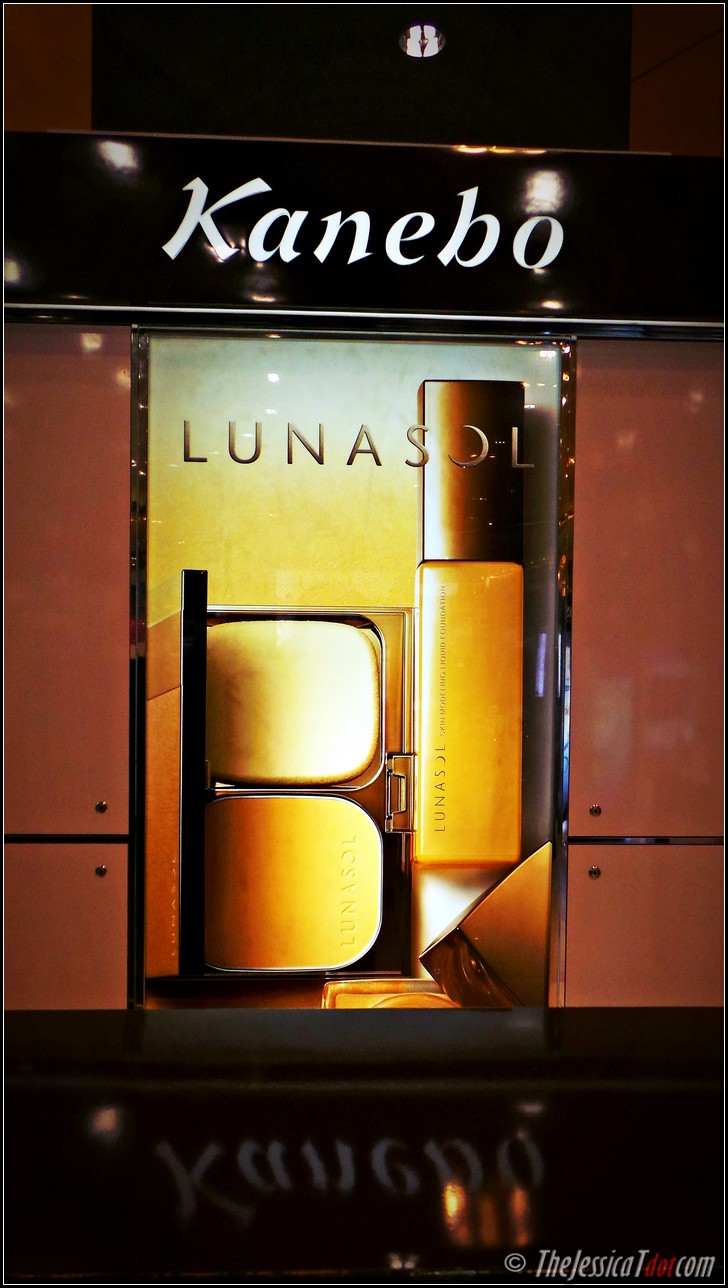
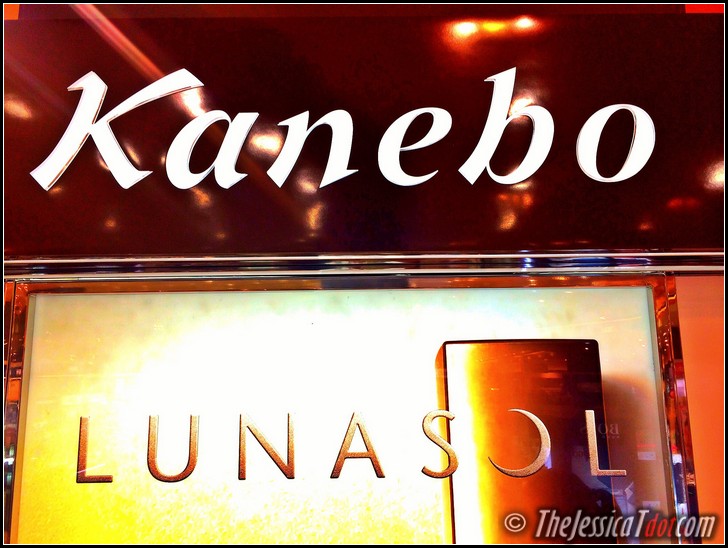
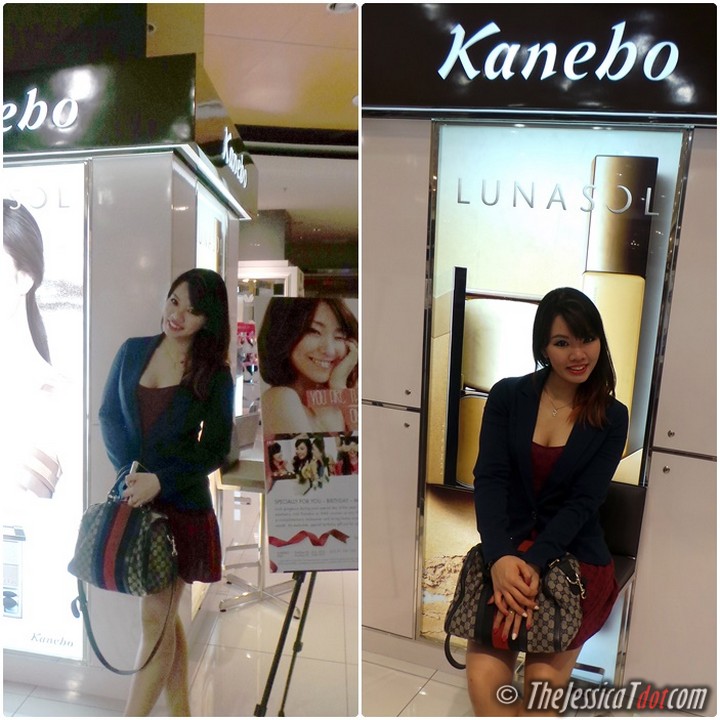
Guess where I am now?


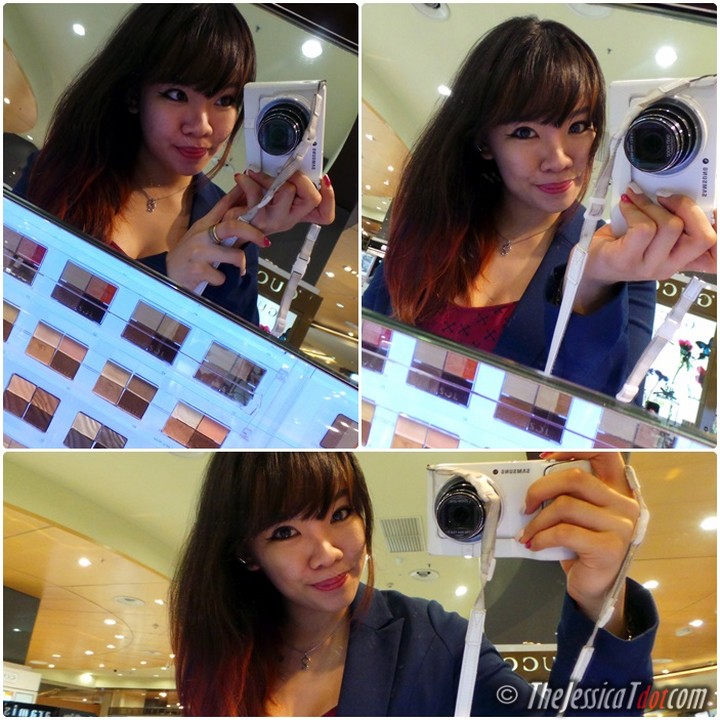
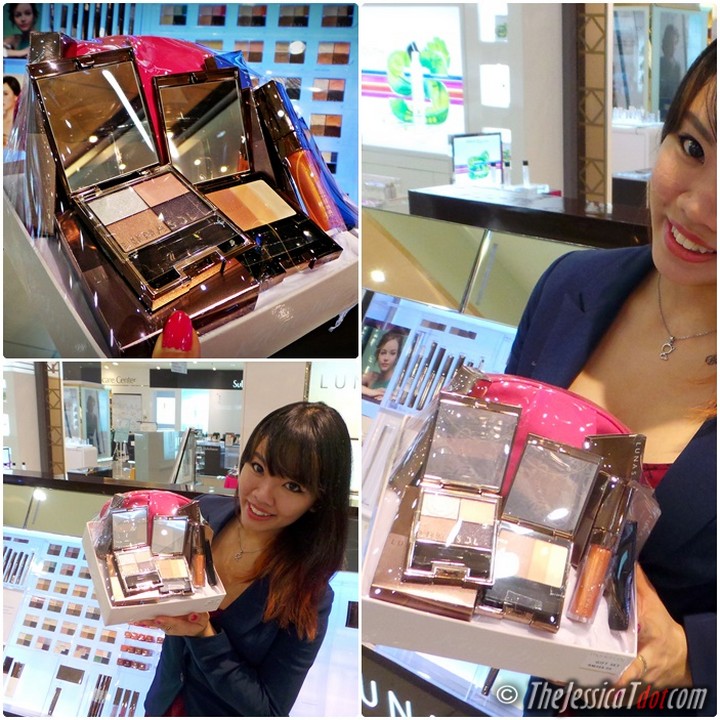
 Greetings from Kanebo’s makeup counter in Parkson, 1Utama!


In the last couple of weeks, I was invited to review Kanebo’s latest makeup range – the ‘Sandy Beige Purification’ brought to us by LUNASOL’s 2014 Spring Makeup Collection.

This features purifiying makeup for spring inspired by the scenery of the sand. The collection shows different aspects of monotone and emphasizes natural beauty without making colours stand out too much.


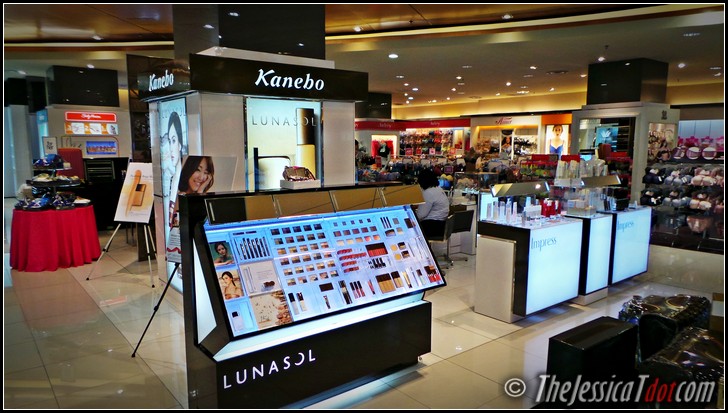
 The Kanebo counter at a glance.


Just a little background before we begin.

Founded in 1887, Kanebo Cosmetics is now a leading Japanese producer of cosmetics which comprises 4 brands under their wing, namely Kanebo, LUNASOL, Impress & Blanchir Superior.

As mentioned earlier, I will be featuring LUNASOL’s latest range which includes their basic skincare, base makeup and point makeup today. Wink


But first, take a look at an overview of the many swatches of colours available from their entire range from the previous collections to the latest!


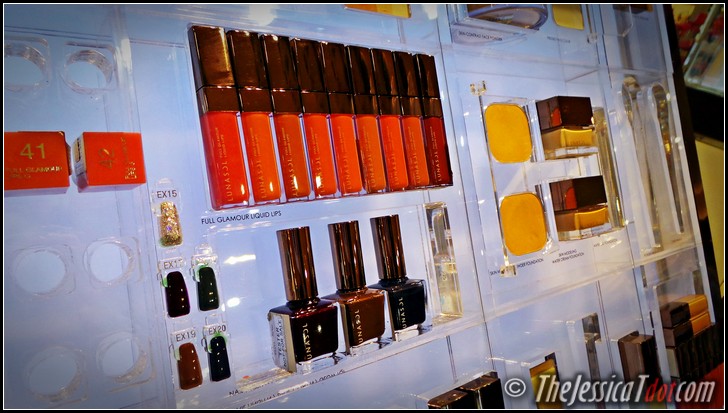
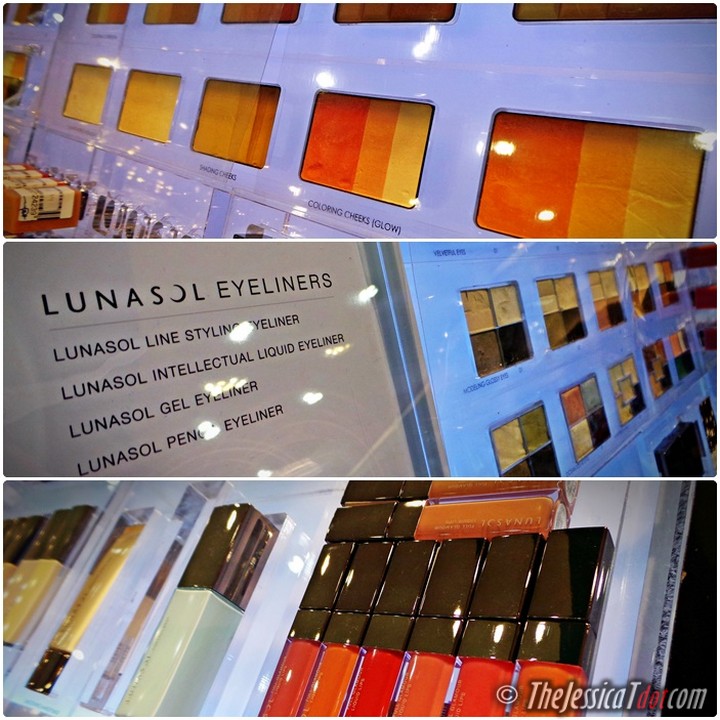
Exciting no? With colours like that in endless amounts of bottles, palettes and applicators, we girls will definitely be spoilt for choice!


Anyway… let’s begin. Ha Ha


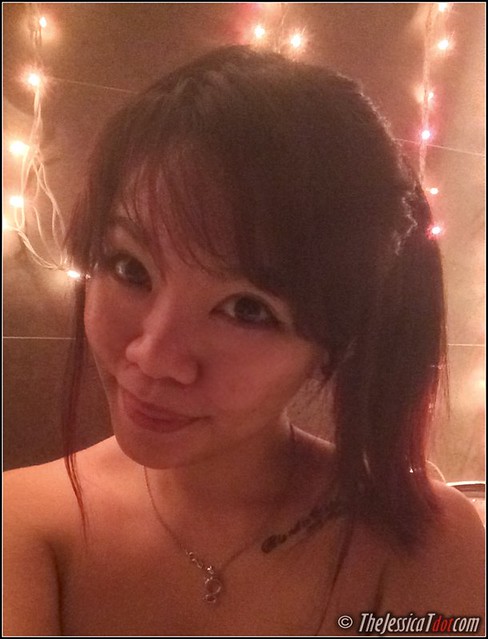
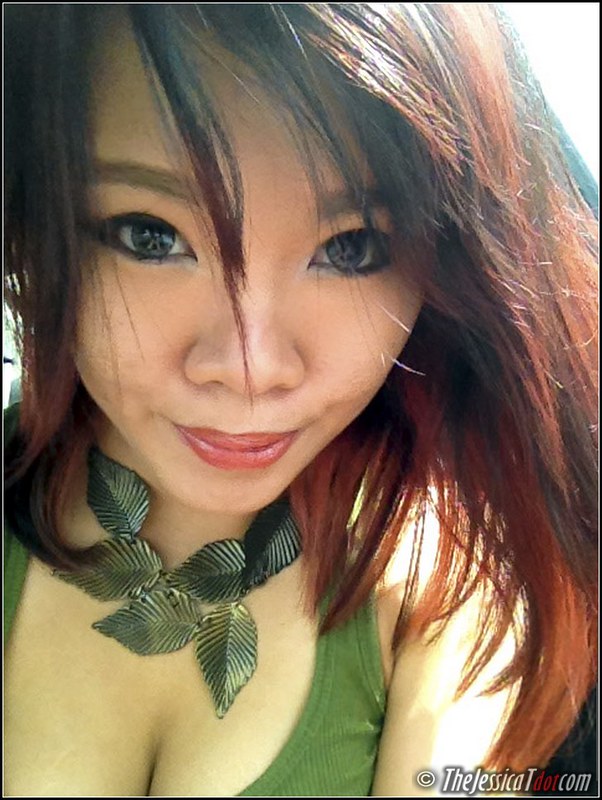
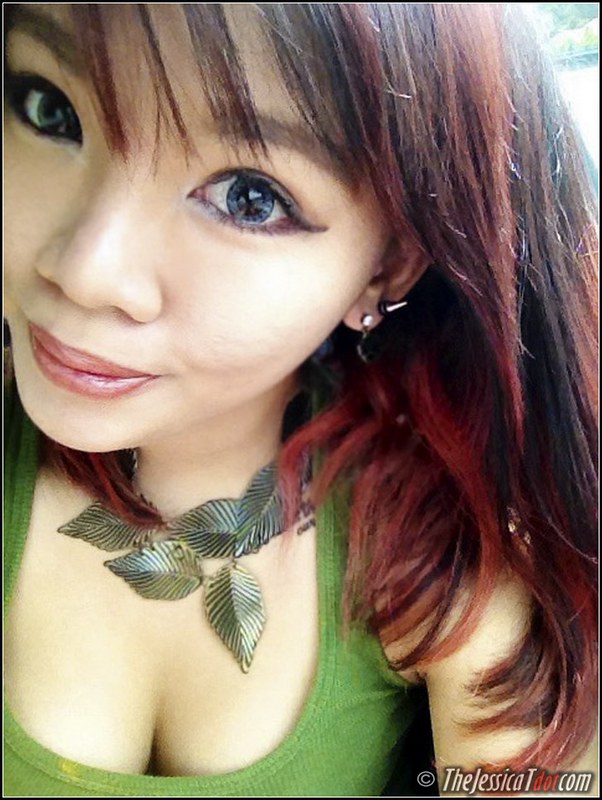
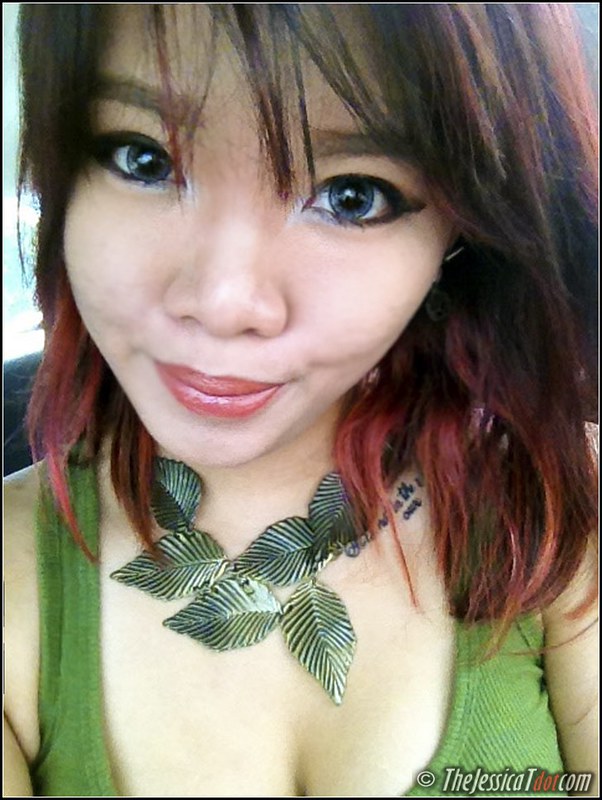
On average days, this is how I would usually look in my everyday basic makeup.


I must admit I’m not a pro when it comes to make up. Crying

Heck, I don’t even know how to apply full make up!

There are lots of things which I omit in my daily make up regime like primer, make up base, eyeshadow, foundation, loose powder, concealer, blusher, bronzer, highlighter, illuminating powder, lip liner and gosh only heaven knows what else women usually slap onto their faces. Surprised


So clearly, I’m excited! Let’s see what LUNASOL can surprise me with!


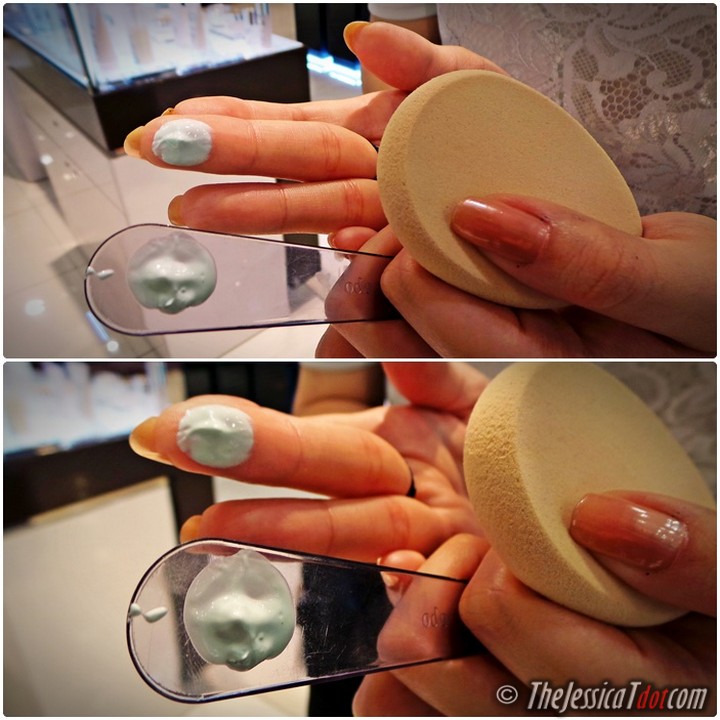
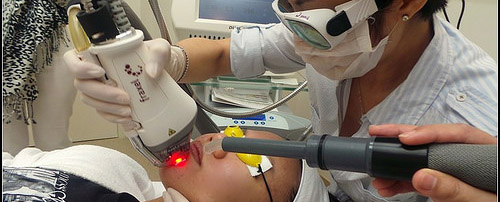
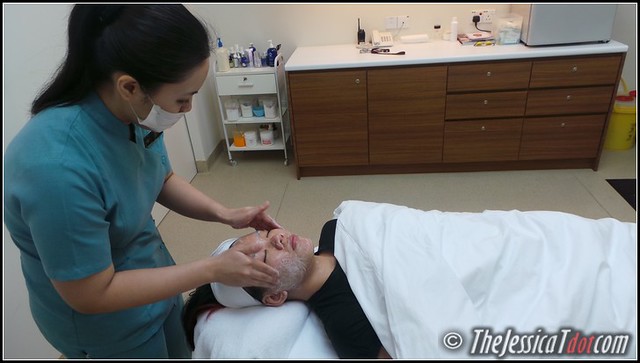
STEP 1: MAKE UP REMOVER


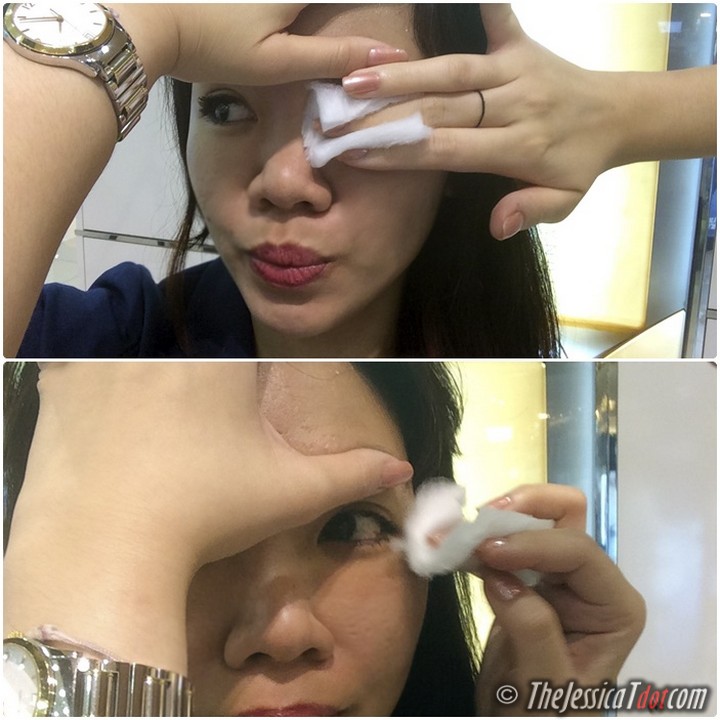
LUNASOL Watery Oil Cleanser.


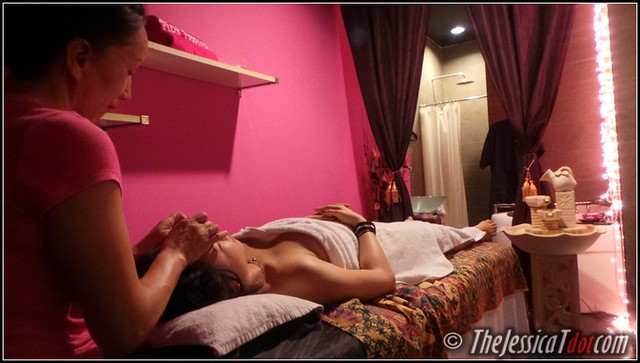
Since I already have my makeup on, my make up artist had to first remove it.

This is a cleansing oil with a light feel without any stickiness that instantly cleanses away hard-to-remove makeup, impurities in the pores of the skin and blackheads.

Two rounds of this was applied to ensure face was thoroughly cleansed.

I loved its citrus bubblegum-like scent! Laughing


STEP 2: TONER


Also known as Balancing Milk, this is an emulsion that captures moisture while regulating the water-oil balance.

Leads to succulent, stable skin with a smooth, fine texture.
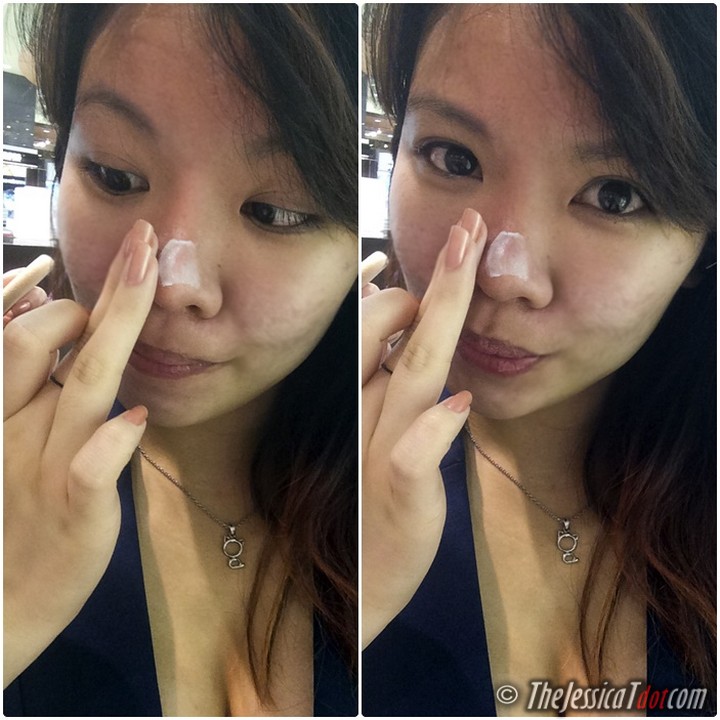
 

STEP 3: MOISTURIZER


Also known as the Moist Conditioner, this is lotion with a succulent, mellow texture that quickly reaches moisture to the entire skin.
It leads to translucent skin by regulating the water balance. Smile

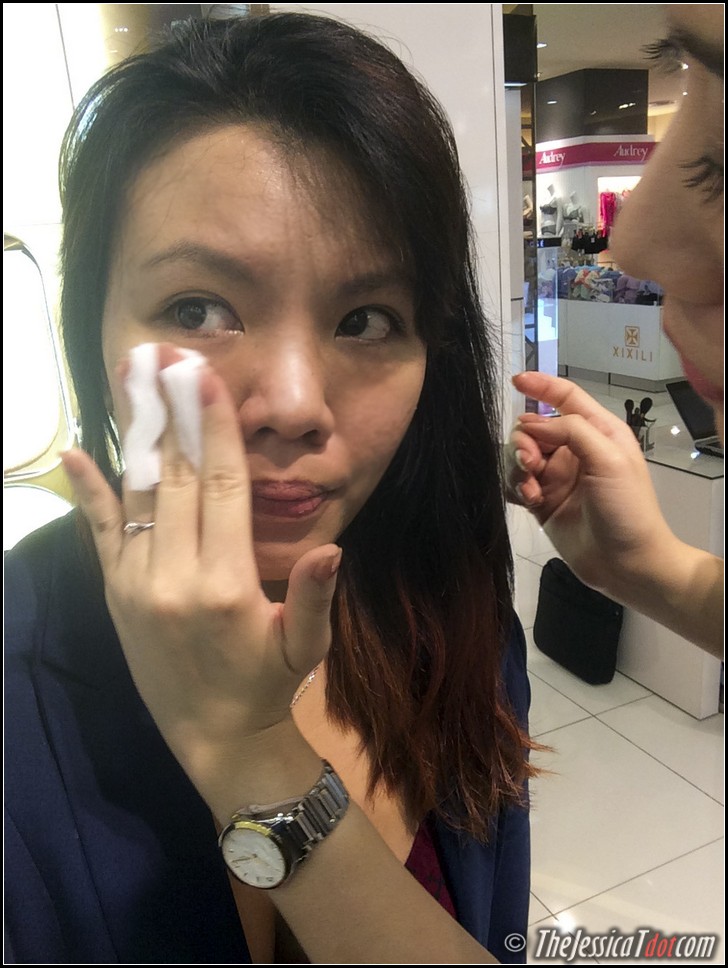
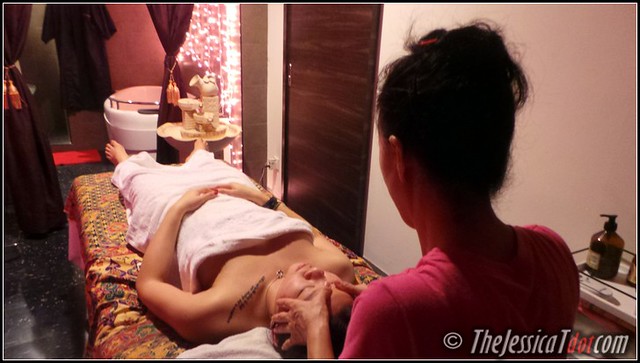
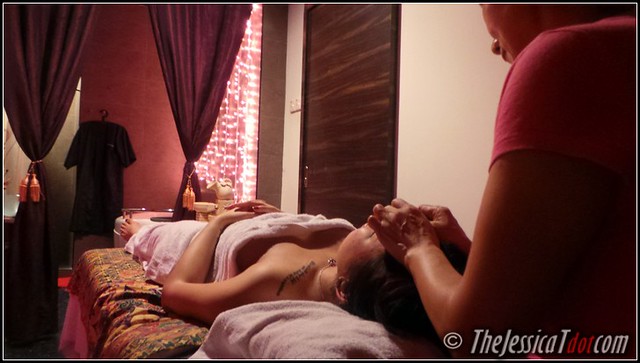
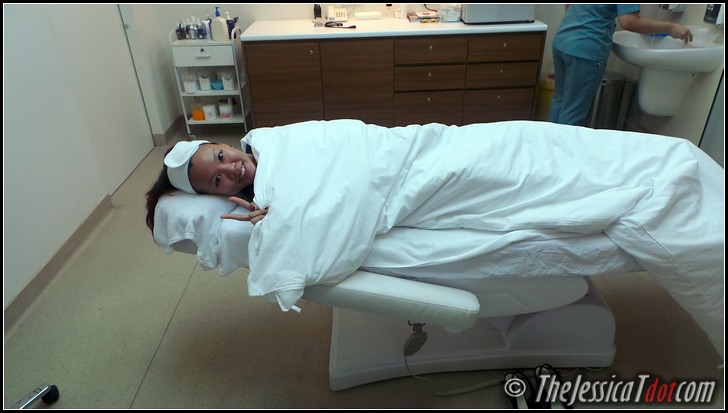
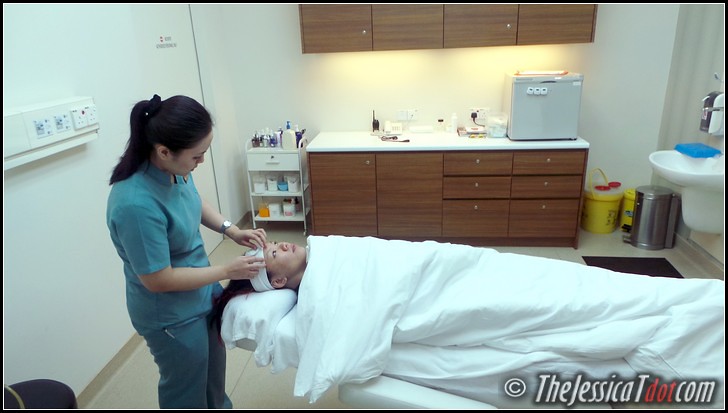
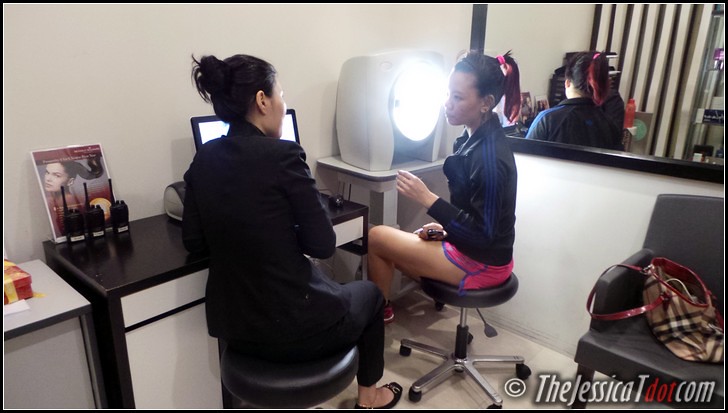
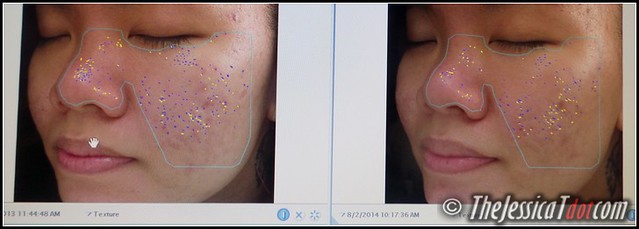
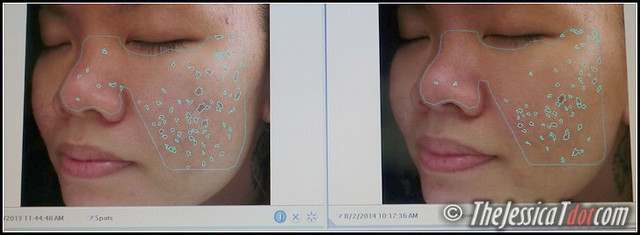
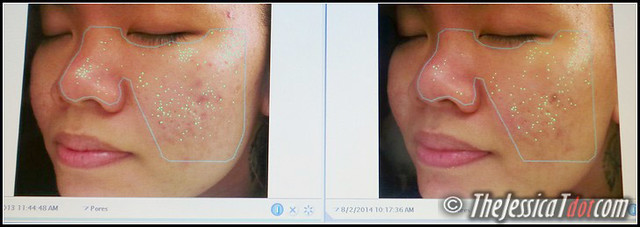
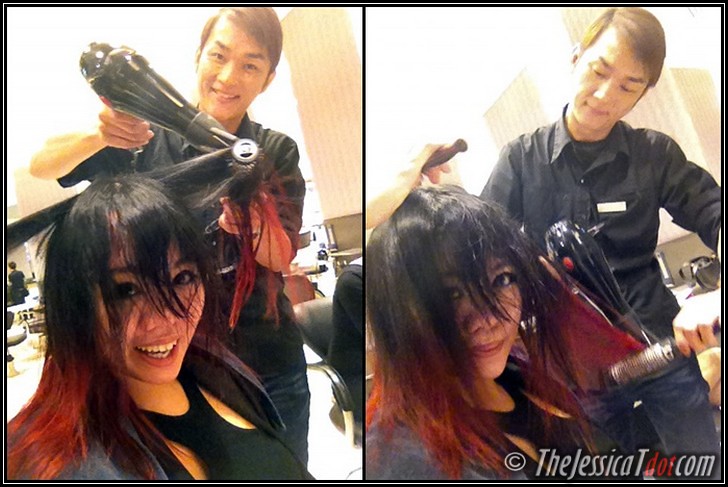
My makeup artist Tshu Chiao was gentle in applying the skincare for me and took the effort to explain whenever I raised a question about the products and ideal skincare regime.


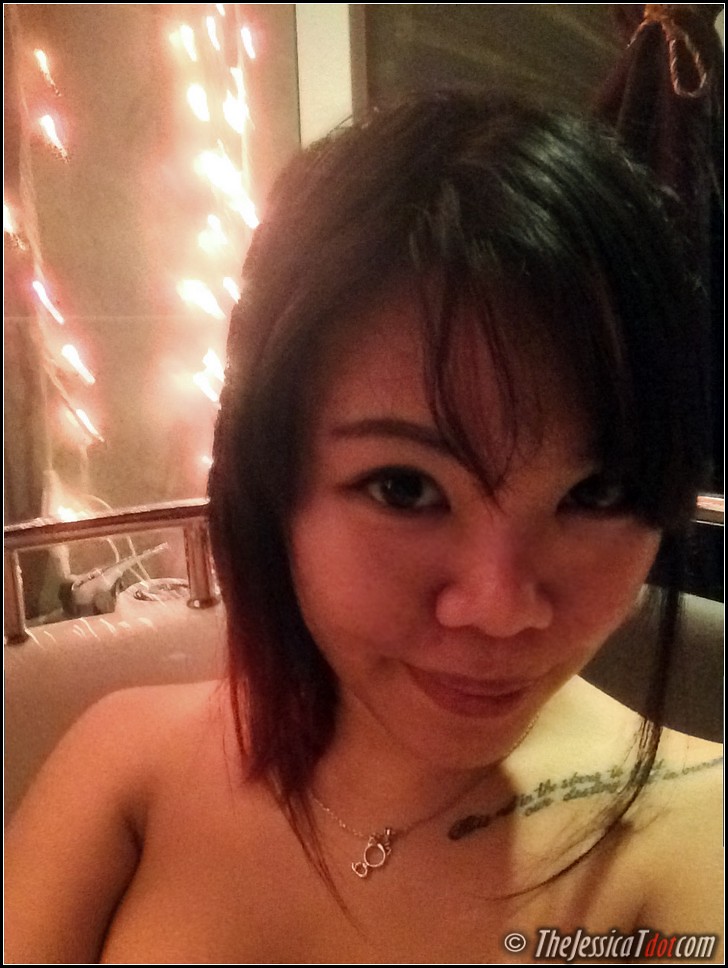
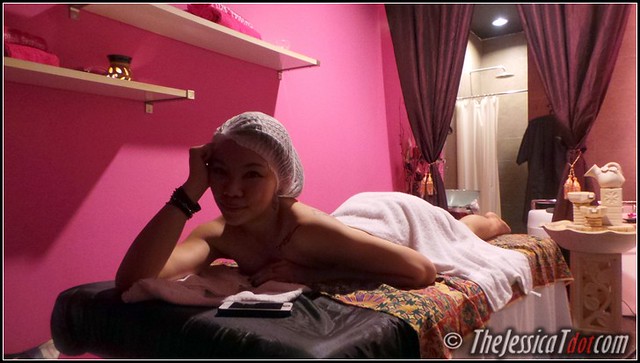
 Ta-daaa! There you go, my naked face.

Hope this doesn’t scare you cos this is how I look before any makeup. Haha!


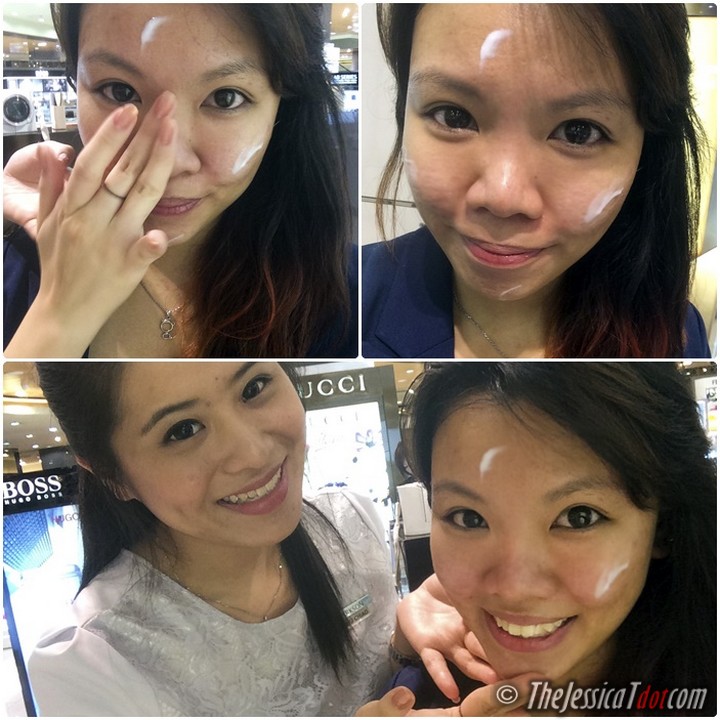
After the Basic Skincare, it’s now time to move on to Base Makeup.

STEP 1: MAKE UP BASE


 LUNASOL Smoothing Makeup Base


This makeup bass helps to fill visible pores and uneven surfaces with a creamy texture and creates an even film over the skin to leave it silky smooth.
It also absorbs perspiration and sebum, and this non-greasy texture as when first applied lasts for many hours. Laughing

Plus point: It also has a sunblock in it! – SPF22・PA++


STEP 2: FOUNDATION


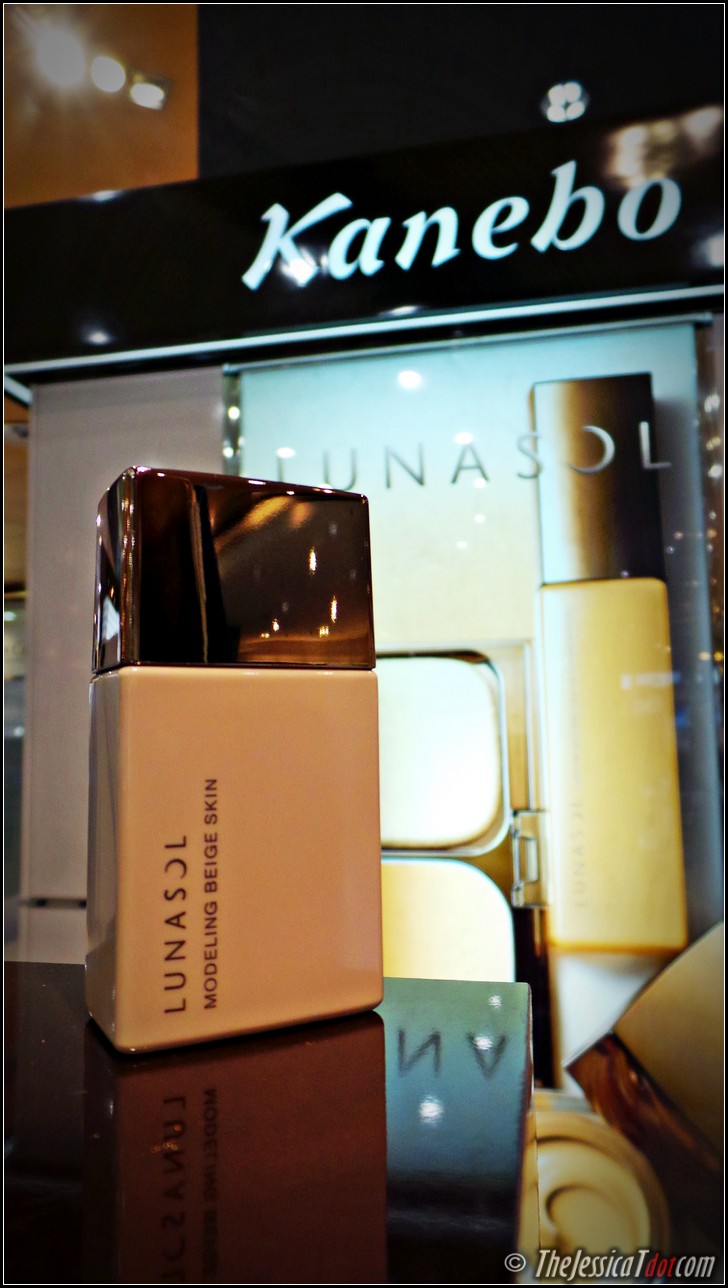
 LUNASOL Modeling Beige Skin


This innovative “Nude Base” was born out of LUNASOL’s famous eye shadow “SKIN MODELING EYES Beige Beige” that makes the skin look beautiful. Wink
Its light texture instantly beautifies your skin while conditioning the skin tone and texture to achieve incomparable beige skin.

This foundation also has a sunblock in it! SPF30・PA++


STEP 3: FACE POWDER


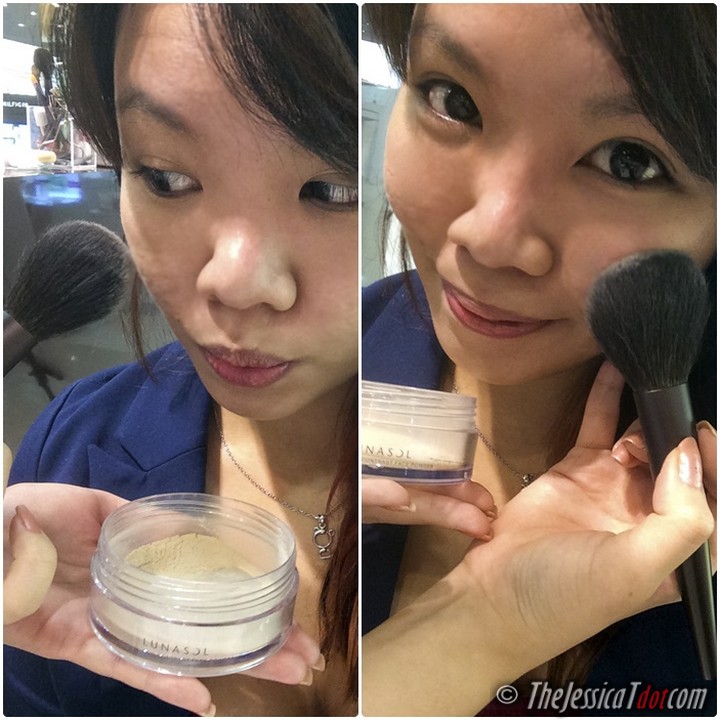
 LUNASOL Skin Contrast Face Powder


A face powder that contains micro-particle powderS that meltingly blends with the skin, leaving it crystal clear and elegant looking.

This helps to achieve a velvety smooth texture, as if a translucent veil lies over the skin!


That’s the end of the Base Makeup, which preps your skin for the Point Makeup.

Initially, I didn’t know what Point Makeup meant as well. Frown

I found out that it is actually your regular makeup such as eyebrow pencils, eyeliners, eyeshadows, lipsticks, blushers and so on. These colours helps to give life to your face!


STEP 1: EYEBROW PENCIL & POWDER


Did you know that using different tools for your eyebrows will make your eyebrows look different? Yeah, I didn’t know either.

LUNASOL even has this thing called Brow Styling Mascara! For review purposes, I decided to stick to the basics.


LUNASOL Brow Styling Pencil and Brow Styling Compact Powder


The pencil allows users to draw lines as if adding individual hairs to the eyebrows.

Thick or fine lines can be done with a soft touch to create eyebrows with a natural, soft look. This is easy to use so that anyone can create beautiful, detailed eyebrows.

The powder on the other hand, creates natural, three-dimensional eyebrows. (wow, right?)

Natural-looking eyebrows now has more depth by adding the nuance color to three light and dark colors. Definitely recommended for the advanced makeup users! (Not for newbies unless you are naturally gifted at makeup from the start)


I fear I might make a complete fool of myself should I attempt using that.
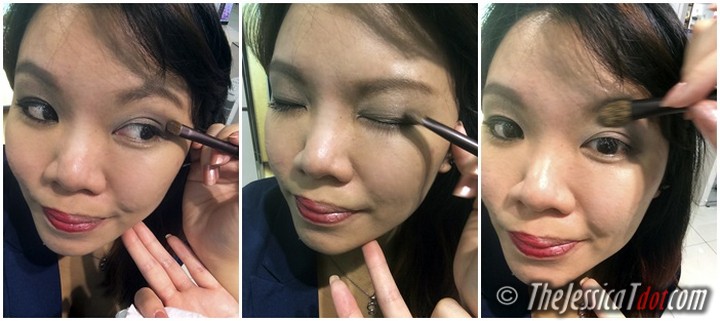
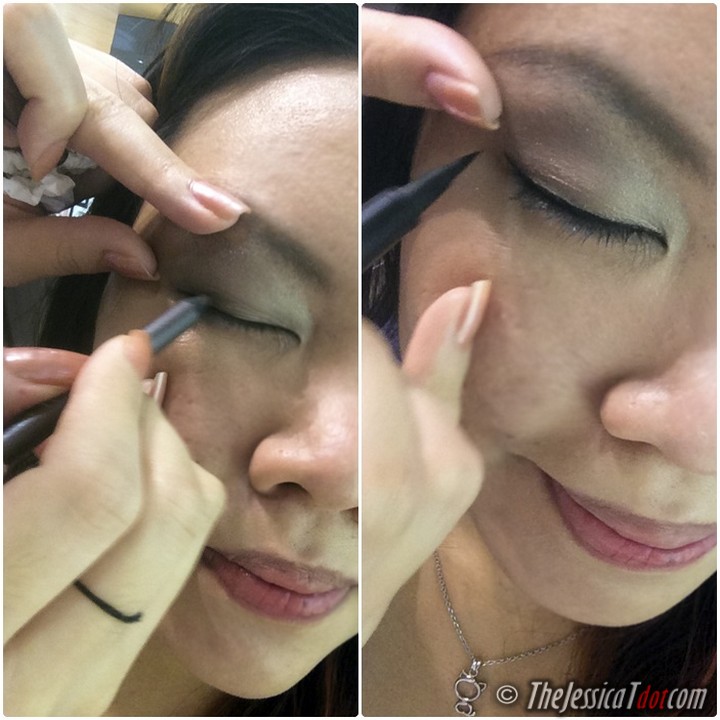
 

STEP 2: EYESHADOW


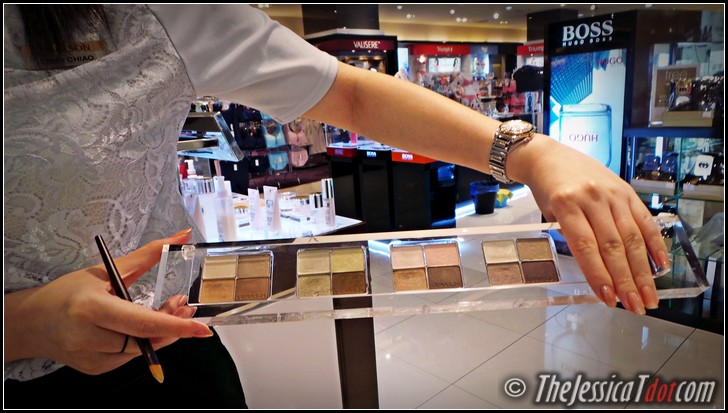
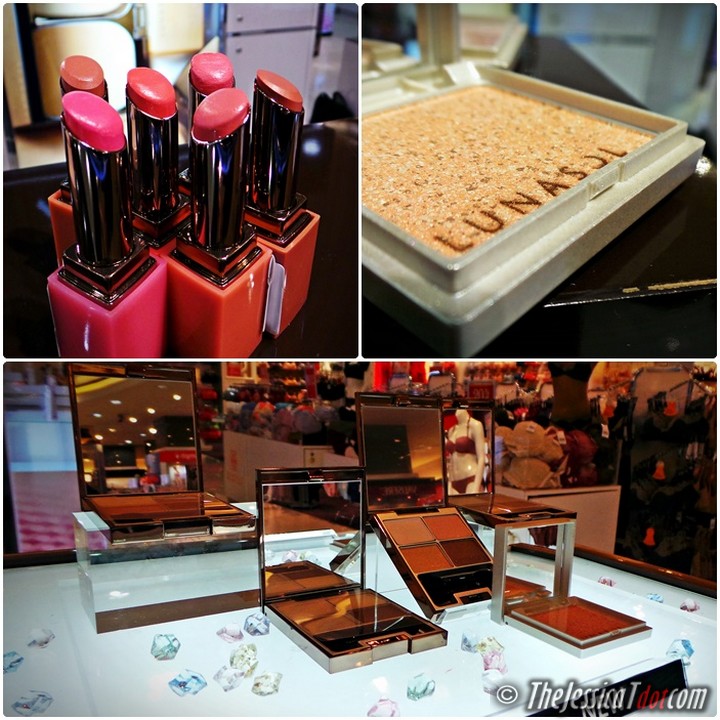
 LUNASOL Sand Natural Eyes


A four-color eye shadow set that consists of beautiful monotone colors, as if cut from the scenery of sand!
All colors meltingly blend with the skin, and the overlaying exquisitely accentuates the natural contours of the eyelids for a dramatic look.

Check out the effects of the 4 different colours palettes:


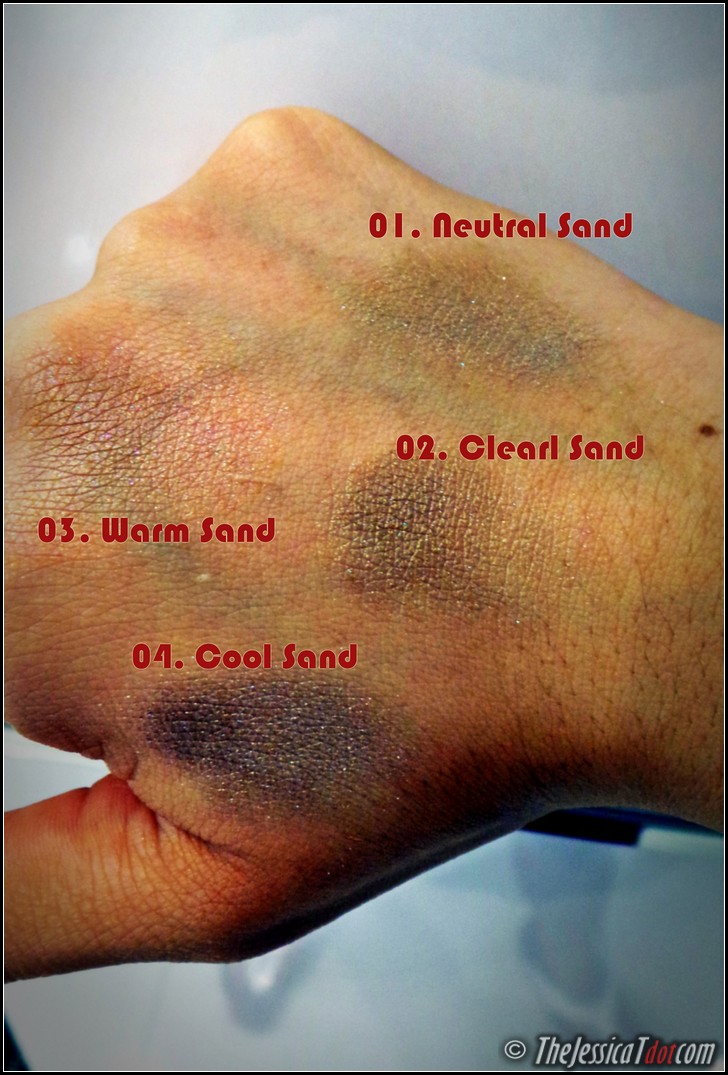
They have the Neutral Sand, Clear Sand, Warm Sand and Cool Sand.

So which did I choose? Personally. I love dark makeup.

By dark makeup, I am referring to darker shades and darker, bolder and deeper colours that stand out! I used to have a goth/emo/punk phase back when I was a teenager so I guess this streak still lingers in me a little. Electric Shock

Even till now, I absolutely dislike the ‘barely there’ or ‘nude’ makeup look. It makes girls look so pale and odd. Just my two cents.


 Needless to say, I chose the forth one – Cool Sand.


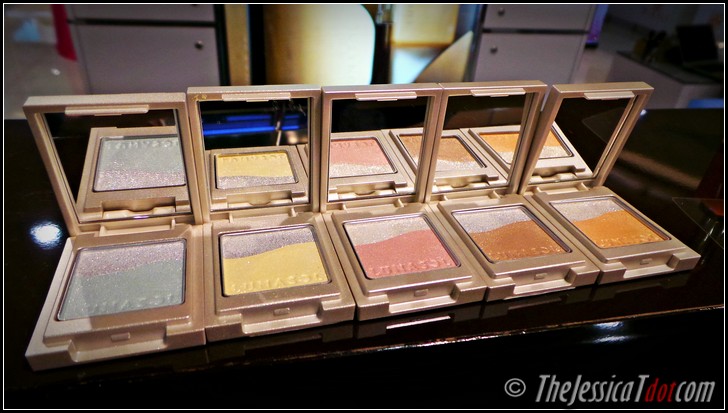
 They actually have another range of eyeshadow as well.

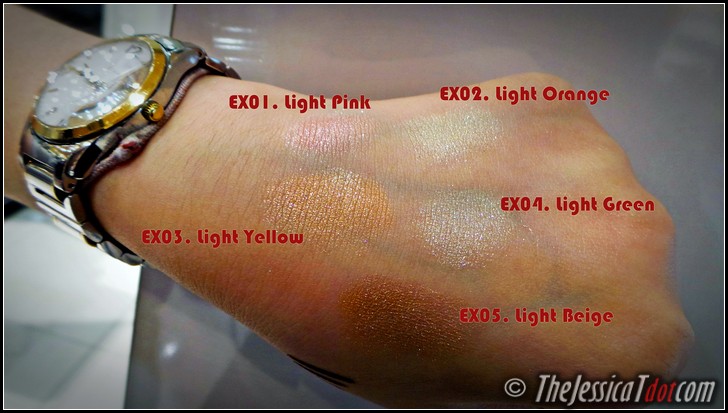
Sand Pastel Eyes, which comes in light pink, orange, yellow, green and beige.


This is a limited-edition bi-color eye shadow set reminiscent of the scenery of sand.
These shiny colors with sand-like sparkles sits over the airy pastel colors for a spring-like finish adorned with clear colors and sparkles.

Unless I am going for a garden party, a kid’s birthday, a baby shower or a wedding dinner, I usually don’t wear ‘sweet’ pastel colours. Told you, I fancy the bolder, darker colours that packs a punch and an attitude to boot. 😉
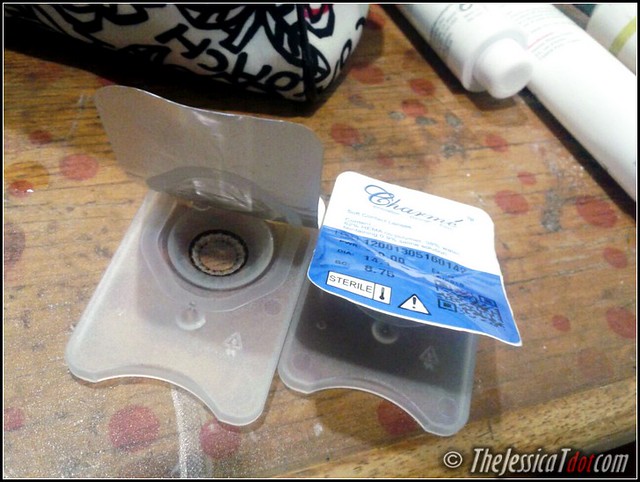
 

STEP 3: EYELINER


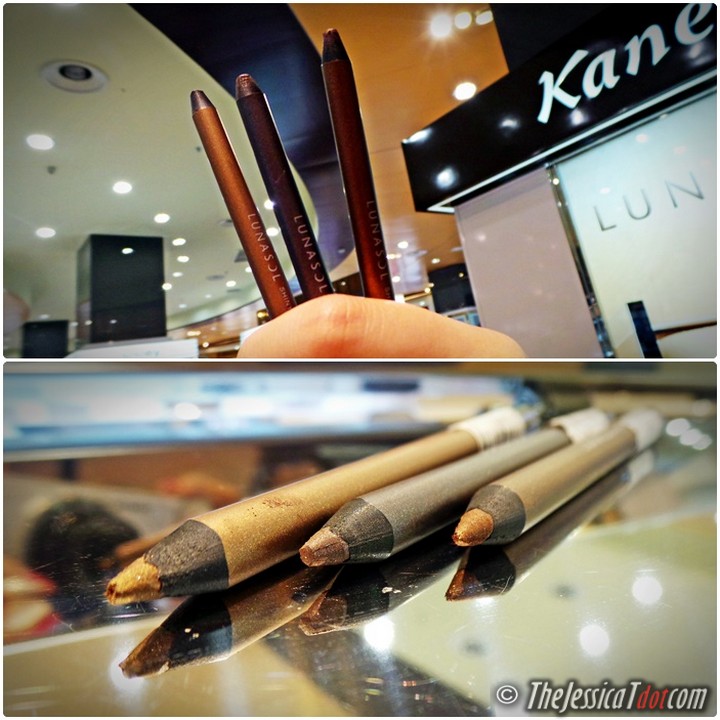
 LUNASOL Shiny Pencil Eyeliner


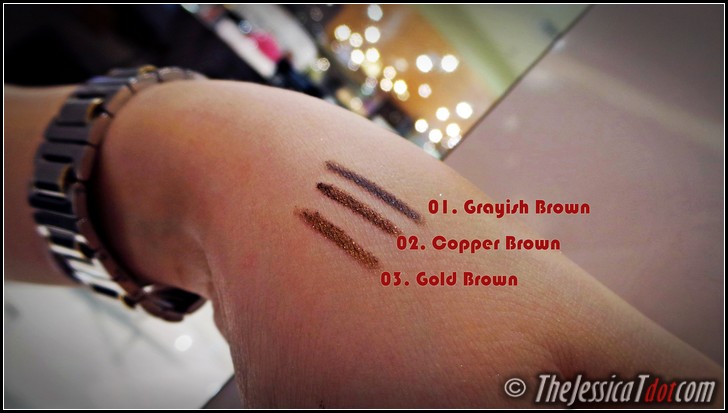
This is a pearly eyeliner pencil that naturally blends with the skin while defining the eyes.
It emphasizes brown variations with superb nuances.

After applying this eyeliner, I found that it wasn’t dark enough for me. 

So when I mentioned that it wasn’t dark enough, my makeup artist quickly recommended something darker and bolder called the Intellectual Liquid Eyeliner.


 LEFT: Pencil Eyeliner | RIGHT: Liquid Eyeliner


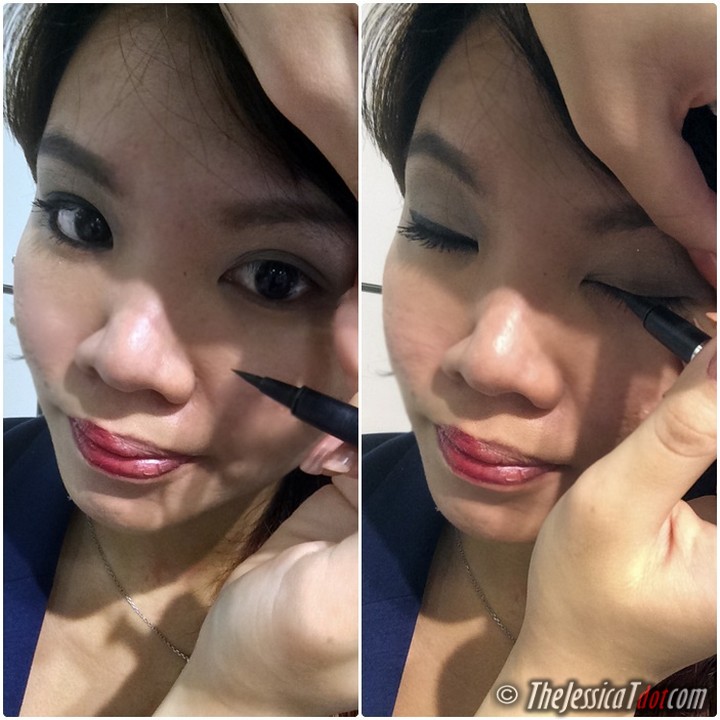
This liquid eyeliner draws professional-looking eye lines with a delicate touch.
The long-lasting effect has been enhanced with the same smooth touch that is unique to a brush-pen-type eye liner. It blends with the skin and defines the eyes naturally.


STEP 4: MASCARA


LUNASOL’s 2014 Spring Collection does not feature any mascaras for that ‘spring-like’ fresh-faced neutral look. But the mascara is quite a vital tool for me so I insisted to have it on.

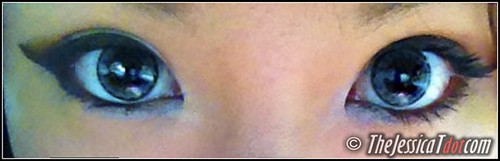
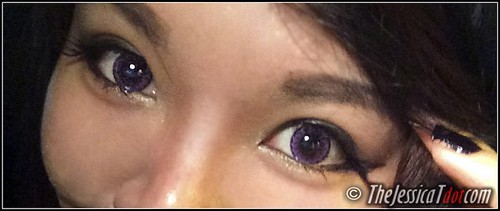
Here’s the effect of the Lash Defining Mascara from previous collections.


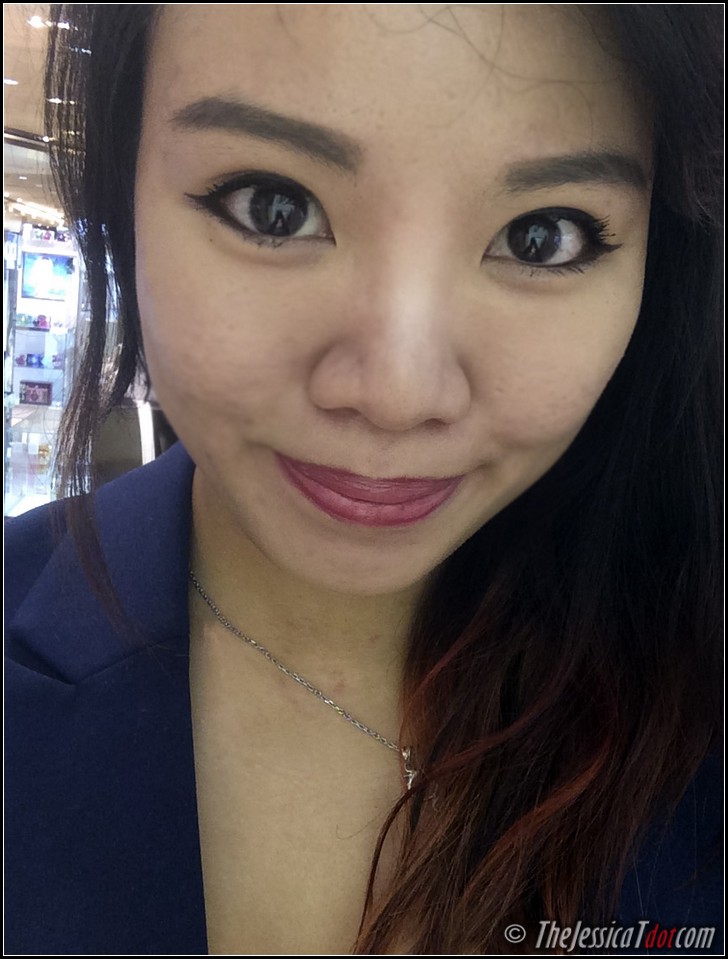
 Yup, that’s me. My kind of kohl-like cat-eyes


STEP 5: BLUSHER


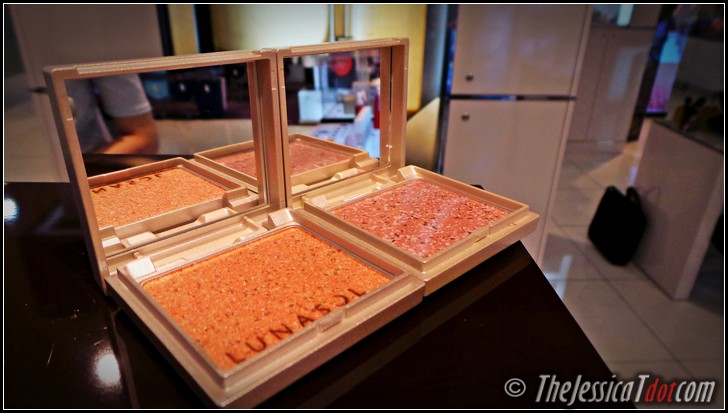
 LUNASOL Sand Natural Cheeks


Let it be known that I have never applied blusher in my entire life before. LOL!

Honestly, I don’t like pinkish rosy cheeks as I prefer a sharper, more sunken, chiselled look  due to my naturally high cheekbones. (Although my prominent cheekbones can get quite annoying in photos) Cry

Another reason is that I wasn’t blessed with a good complexion so applying blusher might only emphasize that flaw. 🙁

Regardless, for my girls who like to apply copious amounts of blusher, check these two shades out!


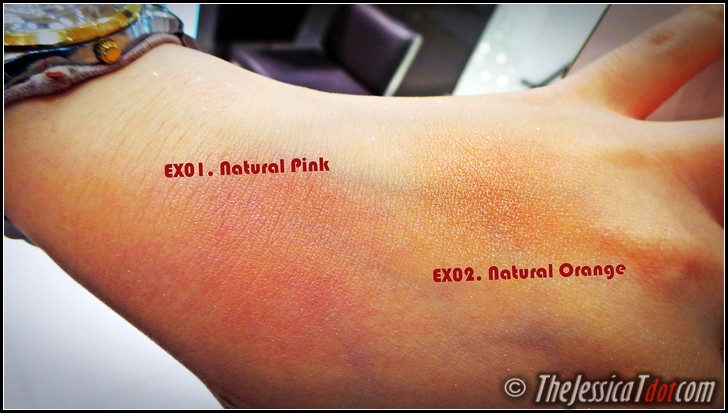
Natural Pink and Natural Orange.


This is a limited-edition cheek color that looks as if the ever-changing scenery of sand has been captured inside it.
Blending three colors creates a subtle radiance and healthy look and also blends well with the skin tone to create a natural, healthy-looking complexion.
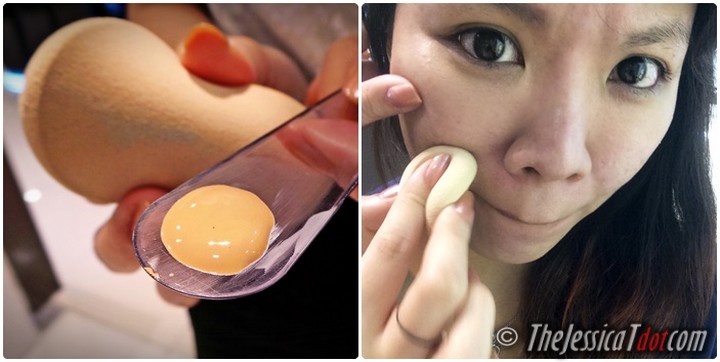
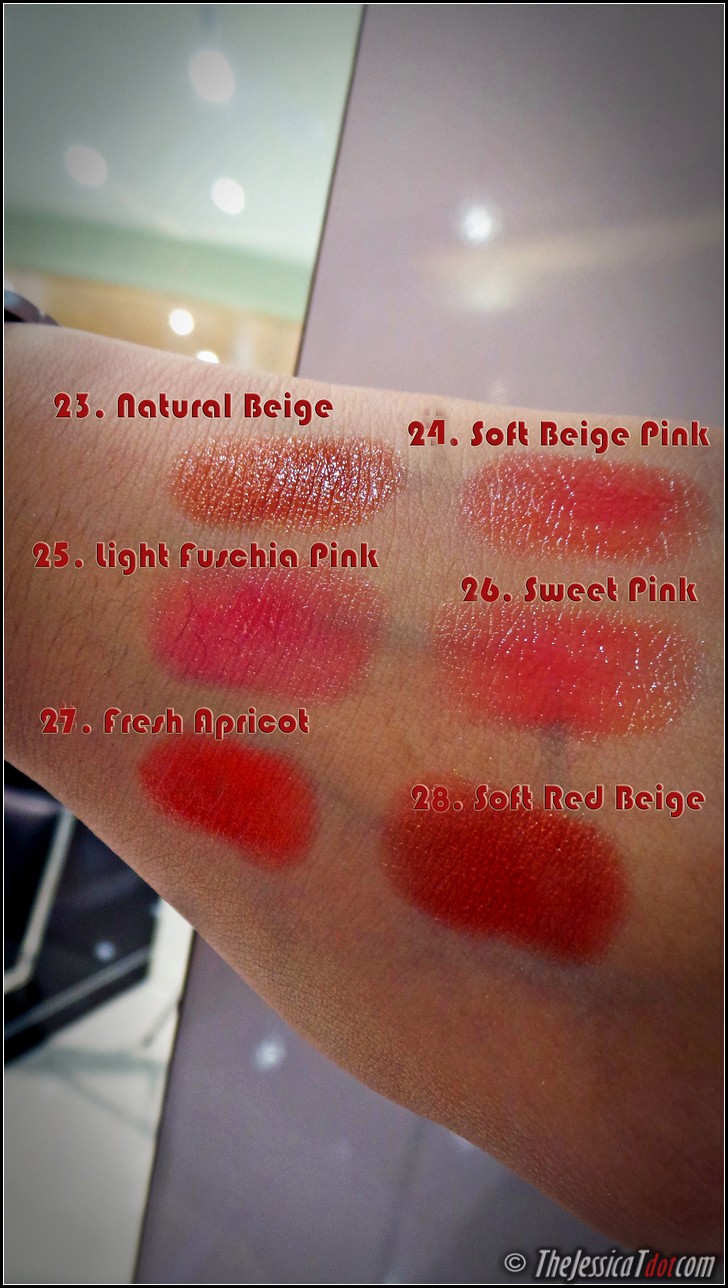
 

STEP 6: LIPSTICK


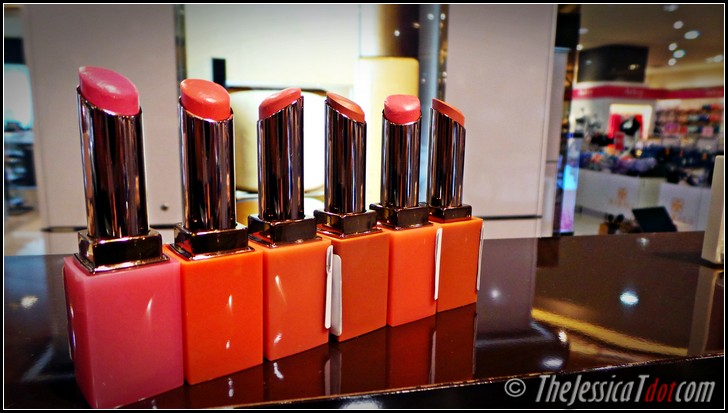
 LUNASOL Full Glamour Lips


Introducing 6 new colors for spring inspired by the natural color of the lips.
This adds a luster that appears to come from within while complementing the skin.


This lipstick is so fun to apply!


You can clearly see the moist, rich colours from the texture on the back of my hand. 

It comfortably adheres to the lips with a meltingly smooth texture and brings out the beauty of the skin with a fresh color and luster.

Ha HaHa HaHa Ha

We’ve come to the end!

Wow… 6 steps in total of Point Make up. And that doesn’t even include the first 3 steps in Basic Skincare and the next 3 steps in Base Makeup! Surprised

Now I totally get it when people wonder why girls take so long to do their full-makeup.


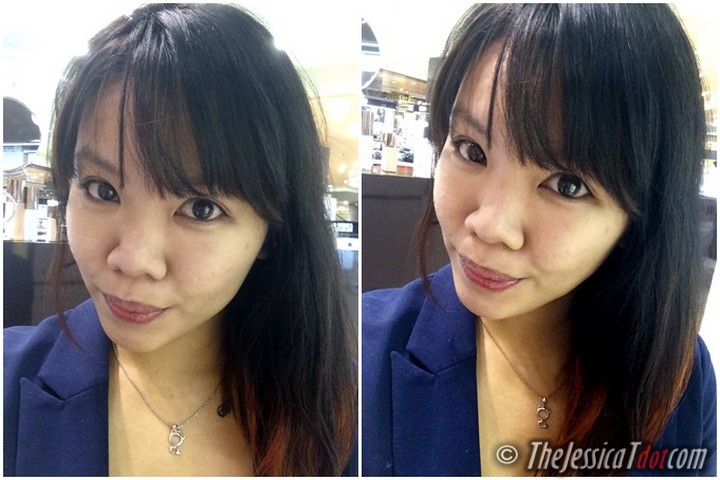
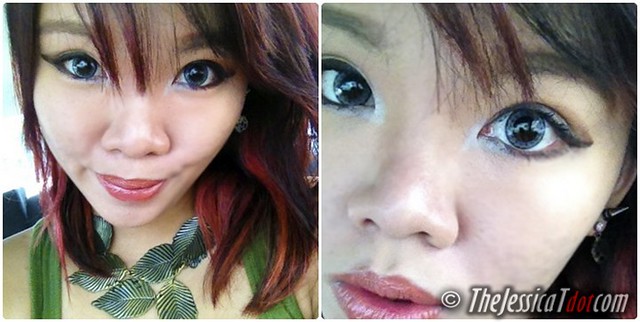
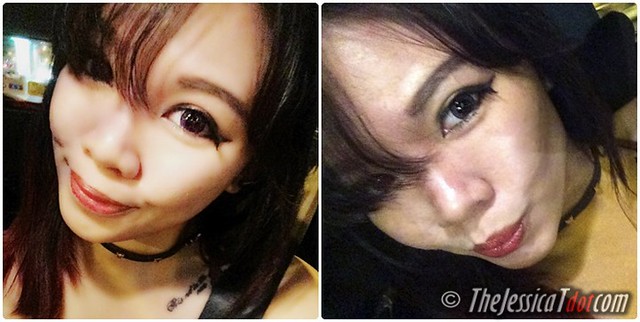
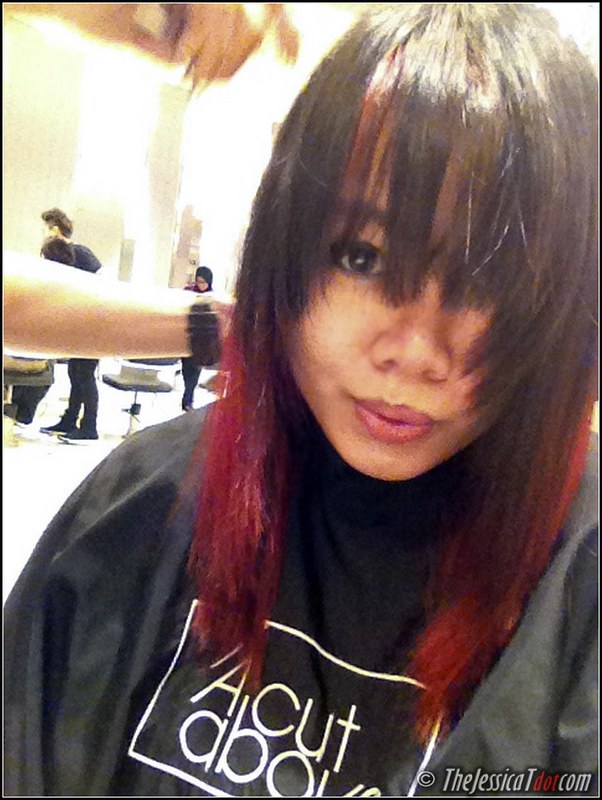
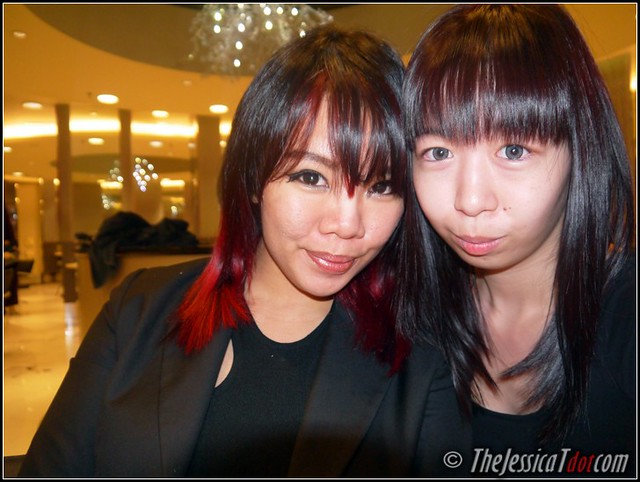
Just to show you the difference, here’s a funny photo of me.

The left is with full makeup and the  right has no makeup. So weird!


This reminds me of DC Comic’s Batman’s arch-enemy – Two-Face.

So just like me, left is with makeup and right is without makeup HAHAHA


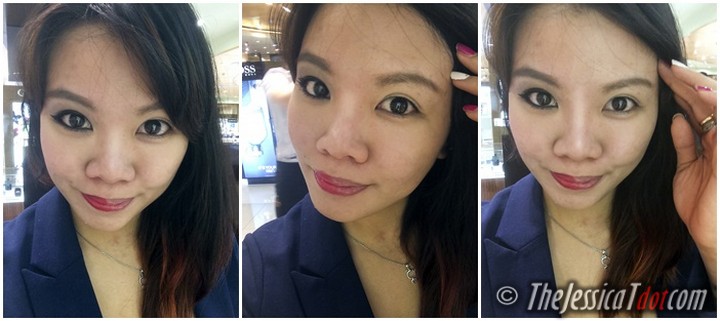
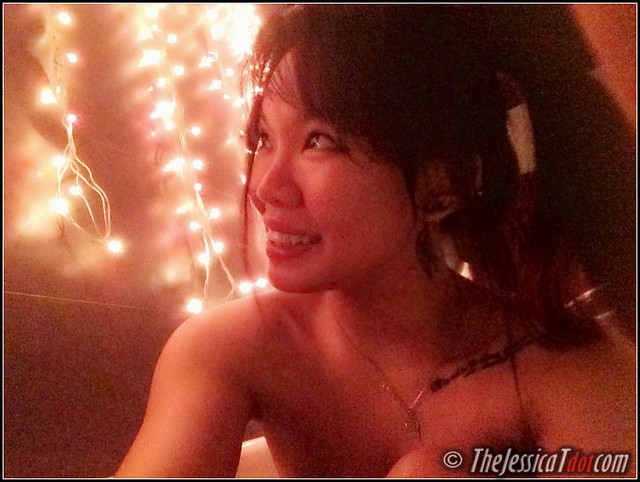
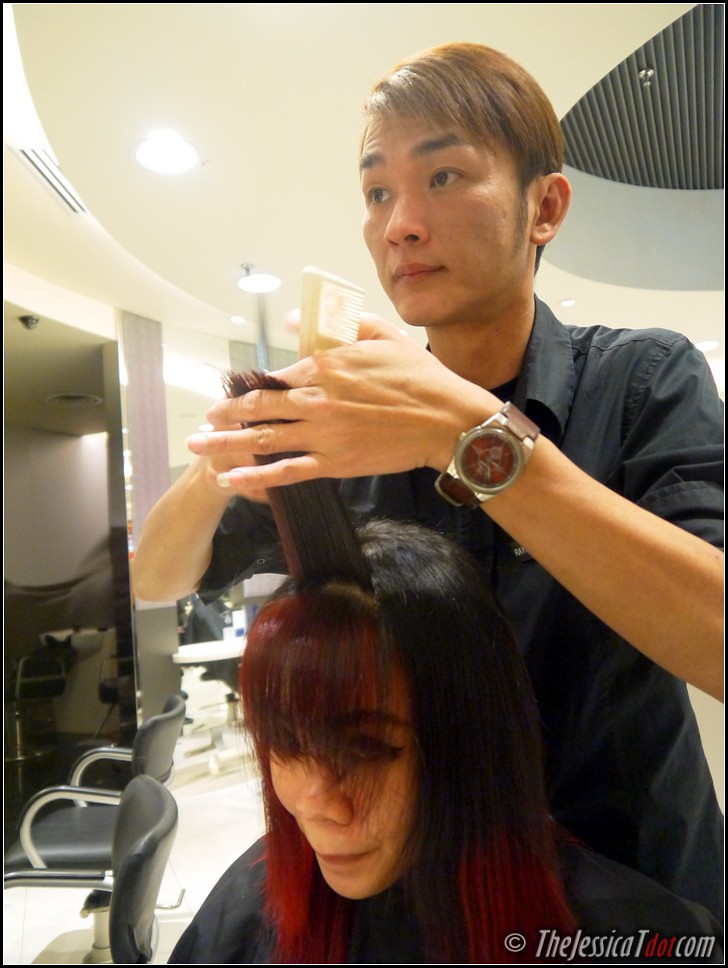
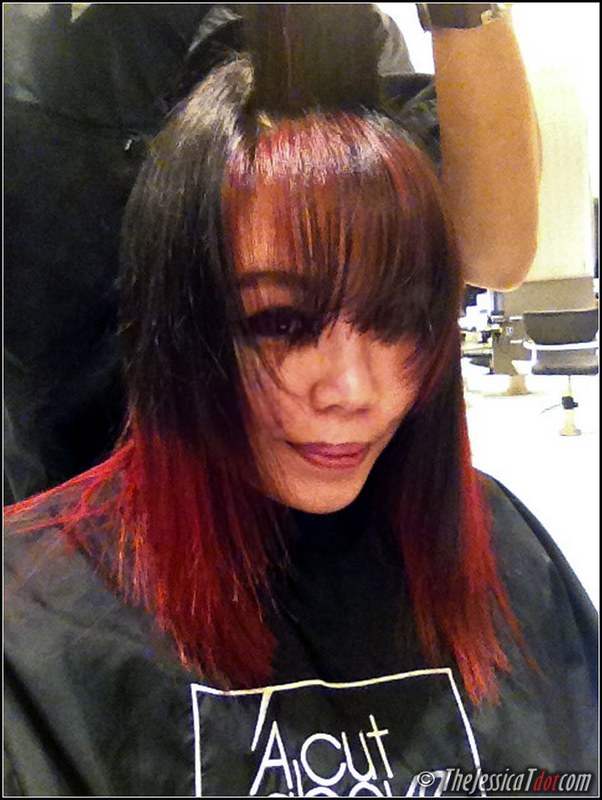
After I was satisfied taking the pictures, my makeup artist continued with the other side of my face to balance the look for the final outcome.

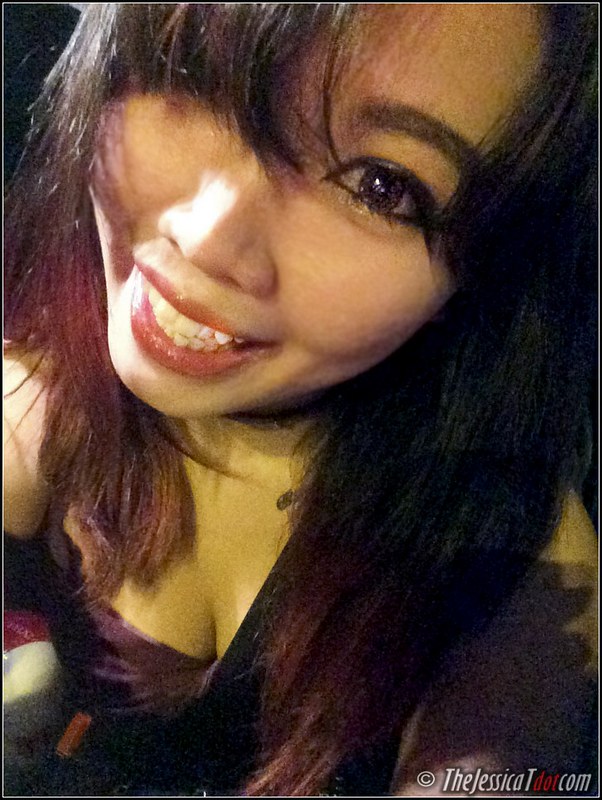
I must say that I’ve learnt a lot from her and am happy the results of the makeover! Laughing


Despite feeling a little odd with blusher on (my first time!), I think she did a fantastic job at recreating LUNASOL’s 2014 Spring look on my face with a slightly dark twist – just to suit my style, as requested.

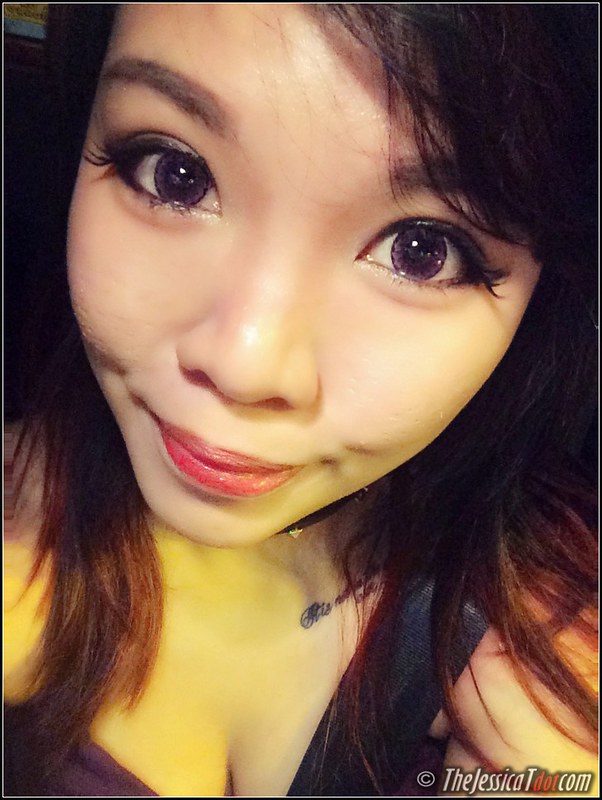
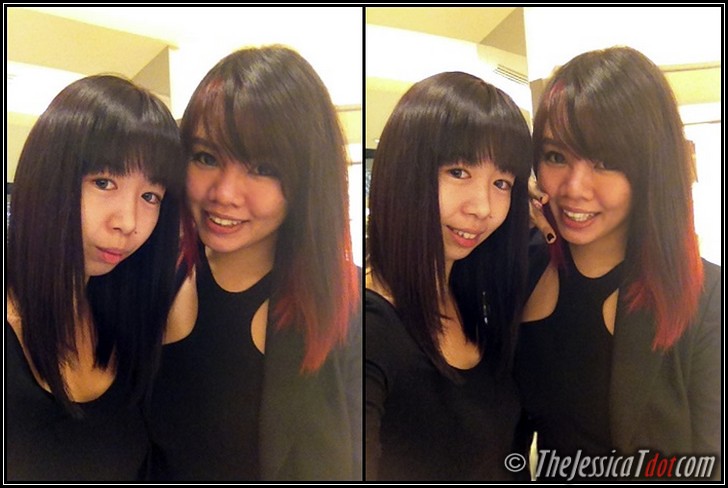
Here’s a Before VS After shot, like I promised.


BEFORE (no makeup) VS AFTER (with LUNASOL makeup)


I usually go to the office without makeup (and even wear my glasses!) or with very light makeup on.

The only time I wear makeup is when I’m hanging out with my circle friends, going out dating or late-night partying. Apart from that?

I’m a monster with no makeup on HAHA. Ahh!


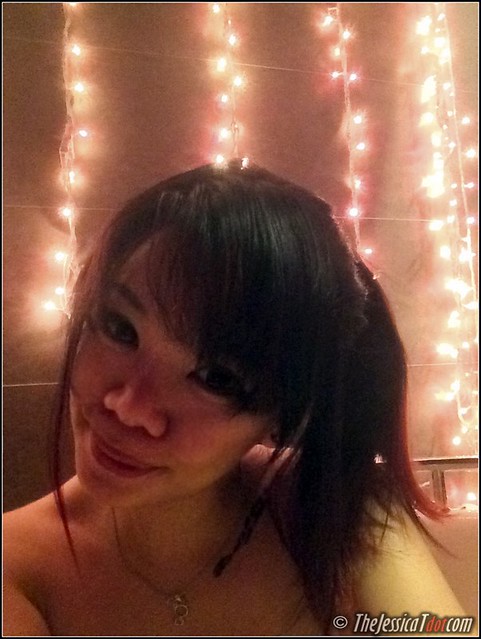
Decided to throw in a little extra. Here’s another Before VS After comparison!


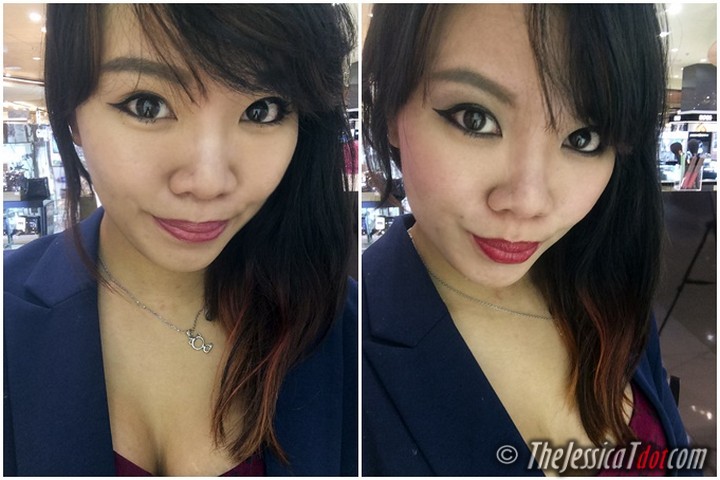
BEFORE (My usual daily makeup) VS AFTER (LUNASOL makeover)

I like the right one better! Hmmm.. maybe I should consider using blusher after all 😛


 Thank you, Kanebo for a wonderful evening.

I learn so much about makeup, blending, and skincare that I never knew prior to this!


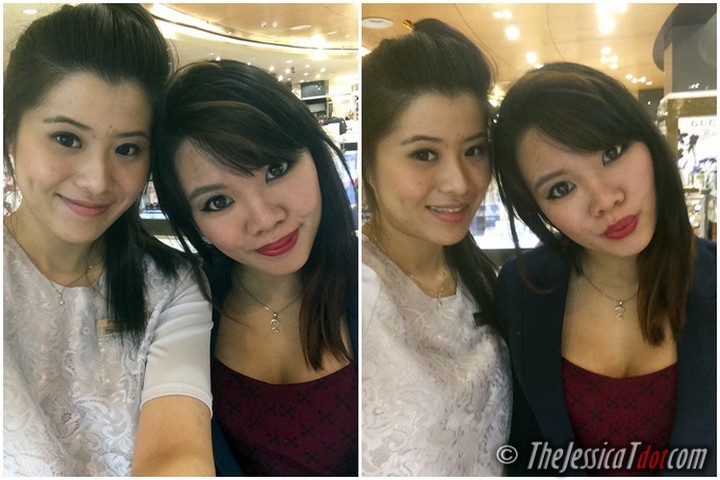
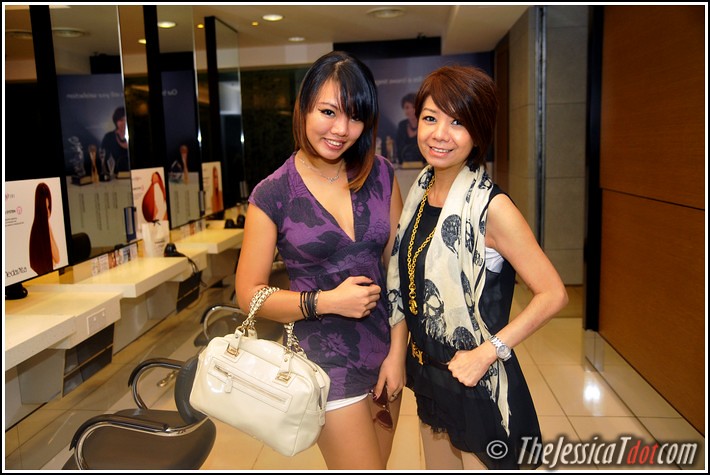
 Also, mega credits go to my makeup artist of the day Tshu Chiao.

We got along so well!


If you fancy LUNASOL’s new 2014 Spring Collection, why don’t you pop by your nearest Kanebo counter?

Check out their store locations: here


You can always give their gorgeously packaged products a little try!


 Or get their gift set to surprise someone special!


And if the evening wasn’t pleasant enough, KANEBO also gifted me a little cute pink pouch containing lots of travel-sized skincare and makeup before I left!

Such a nifty little surprise. Might be putting that up for a mini giveaway for you readers to enjoy so stay tuned. Wink

 Take a look here when I went for a an afternoon of girly pampering at Amante Nail Spa and Body Care!

———————————————————————————————————————

For more information on Lunasol by Kanebo, get in touch with them!

Log on to their official website at: www.kanebo-my.net

LIKE them on their Facebook page at: fb.com/kanebomalaysia

e-mail them at: info@kanebocos.com.my

Or call them at this contact number: +603-79549170


Share:

My FRAXEL (Fractional Laser) at Beverly Wilshire KL!

March 17, 2014 by thejessicat


About a month ago, I had the chance to give FRAXEL® a try and to experience this high-tech non-invasive fractional laser therapy.

I didn’t hesitate to undergo this treatment at all, given how despicable and horrific I felt my acne scars were.


It has to go – all of it, or at least some of it!


Before I share my story, let me first impart some background knowledge regarding what FRAXEL® is all about and what it can do (thus saving all of you the paranoia and the time from doing extensive research on your own, yes, you’re welcome 😛 )


No you won’t. Now, let me begin.


FRAXEL® is a proven laser technology by Solta Medical, a global leader in the aesthetics. It helps with skin resurfacing, and correcting and refining effects which make it especially popular amongst people with acne-scarred skin (like mine!).


My face all wrapped up in the midst of the FRAXEL procedure! Smile

Here are its main uses:
For fine lines and wrinkles – reduces crow’s feet, brow lines and visible signs of aging
For surface scarring – erasing effects of acne and other scarring
For pigmentation – minimizing the appearance of age spots
For sun damage – helping heal dangerous skin damage
For Actinic Keratosis (AK) – a common pre-cancerous skin condition


If you do have one or more of the above, you’re probably wondering –

is FRAXEL® suitable for me?

FRAXEL® is non-invasive (this means no undergoing the knife or any form of incision!) for people who want to improve their skin condition – and want real results – but don’t want the drastic change or the extended downtimes that comes with plastic/cosmetic surgery.

This treatment fits into any lifestyle and your current beauty regimen. I would know, as I went out for dinner with my buddies immediately after my FRAXEL® session, followed by some coffee and shopping thereafter.

Hardly anyone noticed; they merely thought I had either a lazy or a long day and decided to skip the make-up altogether LOL.


***


I stepped into Dr. Karen Po’s office in Beverly Wilshire Medical Centre KL  and we had an amicable chat before we began with the day’s procedures.  

Beverly Wilshire Medical Centre is an integrated beauty medical centre licensed by the Ministry of Health Malaysia that prides itself in Cosmetic Surgery, Aesthetic Medicine (non-surgical and laser treatments) and Healthy Aging.

They boast a wide range of cosmetic procedures, aesthetic treatments,and health services for customers to attain their desired perfection, be it in beauty, health, and wellness.


The nurses there were extremely accommodating and hospitable!


Also, having previously met, Dr. Karen and I got along rather quickly!

If I remember from earlier conversations, Dr Karen graduated from New Zealand with a Bachelor of Medicine and Bachelor of Surgery. She also holds a Master in Advanced Botulinum Toxin and Filler Techniques, and a Diploma in Aesthetic Medicine from the American Academy of Aesthetic Medicine.

If that doesn't knock your socks off yet, she is also well-trained in aesthetic procedures such as lasers, botox and filler injections and has a special interest in pigmentation disorders, regenerative and anti-aging medicine

Looks like my face (and yours) is definitely in good hands, eh? Big Smile


Here’s a photo of her showing me how the skin’s scarring and healing process works.


She first explained to me what exactly my skin problem was and how she can use FRAXEL® to help. Yes, I am fully aware that I have a relatively serious bout of post-acne scars.

Say no more but I know you’re probably wondering, “Really? But your skin looks fine in photos!” Well, my dear, make-up, lighting and a little post-editing/photo-smoothening effects do help.

But I don’t want my skin to look fine only in photographs. What about real life? Ergo, I was excited to see the effects of FRAXEL® on my acne-scarred skin.


She then went on to examine my face and thus began our consultation session.


Dr. Karen made some quick mental notes and ushered me to the treatment room. My face was then gently cleansed, to allow a fresh, clean surface area for her to work on.


Hello from the treatment bed!

I was then ushered to the skin analysis room where my skin was scanned and scrutinized digitally via a machine from all aspects.

This is where I got my ‘Before’ photo taken for the Before & After shot!


I peered inside the machine to have close-ups photographs of my skin taken.


This was what I saw.


And here I am back on the treatment bed again. Ta-daa!


The nurse began to apply the leave-on numbing cream all over my face and wrapped it in.

I took a short nap while my skin absorbed its numbing effects.


The time has finally come. Pretty sure you could tell I was initially nervous.

It was time for the FRAXEL® laser therapy to take place.


And I recall asking the doctor whether or not it will hurt.
I think I have a relatively high threshold when it comes to pain – or at least I sure hope I do!


She gave me these eye-protectors to wear.
This prevents your eyes from direct contact with the laser beams.


I really appreciated the cold air blowing onto my skin and Dr. Karen’s frequent light tapping on my face with her finger.

Both of which, aided me very well in enduring the discomfort, making the procedure less nerve-wrecking and heaps more pleasant!


The cold air, needless to say, helps in cooling down the heated area while the frequent tapping, psychologically helped distract me from the pain by creating another sensation stimuli.


During the FRAXEL® treatment!


So… how does this work?
I asked the same question too. Here’s what’s happening when the laser beams come into contact with your skin.


Basically, FRAXEL®’s light energy will stimulate your skin’s natural collagen and rejuvenate skin cells below the surface to help smooth the creases and pockets that cause wrinkles and scars.
The treatment only treats targeted problem areas – so the results are focused and effective. Cool Believe it or not, the entire session lasted for only 30 minutes!


Hi! All wrapped up and getting prepped for the mask.


When I was done, they applied a cooling mask on my face for half an hour.


I was then placed underneath an LED light for healing purposes.


Before I knew it, the entire session was over and done with.
It was quick and not in any way torturing/suffering at all!


Applying moisturizer and sunblock onto my face.

In all seriousness however, you might experience a light, prickly ‘sunburn’ sensation on your skin but trust me, nothing you can’t handle.

I can definitely vouch for that!


Leaving Beverly Wilshire Medical Centre.
Thank you very much Solta Medical and Dr. Karen Po Kiss
I had a pleasant time and a very enlightening & informative morning, no less!


As I mentioned before, everything happened as per normal right after the session.
It is advisable not to wear make-up for the next few weeks and a good sun-block ought to be used to protect yourself from harmful rays of the sun, as your skin will be prone to sensitivity during the healing stage.

So clearly, I did as I was told and didn’t wear any make-up and slapped on lots of sun-block. During my daily activities, although I felt as if the whole world was staring at me but in the end, I realized that I was just being self-conscious.


Shot taken immediately after FRAXEL® treatment.

Zero make up (obviously)


Throughout the weeks of healing, my bare-naked face was pinkish and slightly swollen for the first 4 days and then started to become brown and felt like sandpaper to touch for the next 5 days, but that’s about it.
Always remember – moisturizer and sun-block is your best friend!


***


After a month plus, I returned for a skin analysis, as I know many of you have been asking for a Before & After! Patience, pet.


I placed my head into the handy VISIA complexion analysis system machine again to finally have my skin analyzed and for the ‘After’ photographs to be taken.

This is to be compared with my 'Before' shots by the same machine.


This session was useful in helping me understand my skin better; an added service not offered by most of the other clinics.

This is a Before & After result of my 1st session:


Texture

The texture of my skin has improved! Less congestion of blue and yellow dots.

Spots

Spots on my skin has also improved! Check out the nose area and my cheeks.

Pores

Amount of open pores have reduced too. It's difficult to see the difference here because my damaged pores are very old scars

Wrinkles

Haha. Gosh, wrinkles improved the most. Not that I have much (phew!) but wow look!


Not bad at all, after only ONE session! Most patients see visible results in 1 – 5 sessions.

This all depends on how serious/old/deep your acne scars are.

Mine are pretty old (more than 10 years ago!) as I’ve had acne all my life; the worst bout was in junior high school and sometime during my freshman year at college.
Really keen to experience further results on my next few sessions! Big Smile


Interested?

Don’t wait as long as I did; the sooner the better as newer scars heal better than older, more permanent scars.


P/S: It took a lot of guts for me to write this post. In this post, I dared to bare the worst that I've been hiding and concealing from – my horrible complexion. There is not one day I do not feel ugly or self-conscious about it. I hope I've somehow connected to the ones that has been enduring flawed skin too.

You're not alone. I'm here. Feel free to speak to me, whenever!  Wink


————————————————————————————————————-
For more information on FRAXEL® laser technology or to make an appointment,

Address:

Beverly Wilshire Medical Centre, Level 6, 8, & 9, Dijaya Plaza,

No. 237 Jalan Tun Razak, 50400 Kuala Lumpur.

Phone: 1800 88 8802

Email: enquiries@beverlywilshiremedical.com

Business hours: Mon – Fri 8am – 8pm / Sat 8am – 3pm

www.beverlywilshiremedical.com

www.facebook.com/BeverlyWilshireMedical


Also, while you’re at it, you might want to take a look at Solta Medical’s other brands such as the Liposonix® which I blogged about last year.

For more information on FRAXEL® laser technology, log on to their official website at www.fraxel.com

Check out www.solta.com/brands for more info

Share:

NEW HAIR FOR THE NEW YEAR AT A CUT ABOVE!

February 28, 2014 by thejessicat


 Hiya dearest readers!

Today’s feature will be about my new hairdo done by my amazing sponsors, A Cut Above.

They’re the one and only hair salon I’d go and trust to get anything hair-related done!

From simple things like hair trimming and hair dying to chemically altering procedures like hair rebonding & perming, all the way to total makeovers, A Cut Above is the only place I’d recommend.


Trust me on this, they’re so capable that they’ve even rescued me from an atrocious hair disaster by a hair salon I was previously affiliated to.

Anyway, let’s see what hairdo they surprised me with today.


Hi there! Yes, it’s me in both photos –  three hours apart.

BEFORE VS AFTER


I adjourned to A Cut Above in Mid Valley Megamall directly after work to get my hair done.

Yes, yes. I got it just before I left for the Chinese New Year holidays! Pretty last minute, I know, but work has been hectic and that Tuesday night at 7PM was the only slot available on my schedule! Phew. Undecided

The moment I got there after a long day, it was nice to have my stylist Raymond greet me with a smile and usher me to my seat. Feeling Good


Without wasting any time, we got started immediately.

He began examining my hair before deciding what was best to do with it in under 3 hours.


He advised me to get my red hair recoloured (clearly it was fading off!), a hair treatment and a hair trim. Could everything possibly be done under three hours? Wow. Okay, hit me!


 Raymond preparing my hair for the dying process.


As I loved the ombre red (pic above) that the talented Datin Winnie dear gave me on my previous visit, he decided to stick with the ombre red too this time round.


But first, selfies! Raymond and I.


Ombre red process in motion.


I’ve been a red-head all my life. Well technically not ALL MY LIFE as I wasn’t born with red hair (How I wish! Damn, those rangas) Yell

But the moment I graduated from high school back in 2006 and was no longer bound by rules of acceptable hair colour, I turned it bright red the very next day. Many a time I’ve contemplated giving myself a different colour  but no… it really has grown on me after all these years, till a point that it is now recognized as a trademark!

Who else is known as the red headed blogger for the longest time ever? No one but me.

So the red head blogger I shall remain – till the day I die! Ha Ha


It was fascinating to see so many hands work on my hair at the same time.

Looks like many hands do not spoil the broth in this case, but make light work instead!


After all the aluminium foil and dye have been set, they put me under this ring of doom.

Nah, just kidding! It was  a heat ring that rotates on an axis to ensure the heat is dispersed evenly to every section of the hair.


 While I was getting my red hair done, buddy Shannon got her hair dark purple.

T’was fun having her around with me tonight as I’m usually all alone when I get my hair done.


Thanks for this awesome photo, girl! I like this top-down shot of me getting my hair washed.


After the hair wash, they wrapped my head in a towel like this.

Now I know how I would possibly look like if I was donning modern Muslimah fashion!


 To keep my hair shiny and healthy, my stylist Raymond applied a hair treatment for me.

It helps to lock in my new hair colour too! My hair was wrapped up again and placed inside a steamer.


Treatment is over! They unbundled my hair and gave it a wash.


 Raymond then began to blow-dry my hair.


 I was thrilled when I saw my bright red ombre hair in the mirror!


The red head is back again yay!


Evidently,  I was already way too excited seeing myself with red hair again.


After blow-drying my hair, Raymond then decided to re-shape my hair and started to trim it. This was because my hair was cut into an asymmetrical bob on my previous visit as I had really short hair back then.

I was so insecure and self-conscious about the length of my hair as it was my first time having such a short cut but Datin Winnie created that look for me and I loved it instantly!


Love how it’s longer on one side and short on the other. She’s super creative!


Another funky short bob that she created for me.

Master craftwizard of the scizzors, is what I think of when I see her.


Look at this #GetSassooned daring, choppy and angular bob she did for supermodel Amber Chia!

I can imagine what a challenge it was for Datin Winnie as extremely short hair that suits the model perfectly isn’t easy to create.


Anyway, after almost 2 years of having short hair, I decided to have my waist-long hair again.

So Raymond had to give me a new cut so it wouldn’t look odd when it gets long.


 He moved on to my fringe. I wanted my sharp bangs back but slightly longer this time.


 Layering the top part of my fringe.


 And Raymond goes snip snip!


 I’m very particular about my fringe but A Cut Above has never failed me nor given me a bad haircut. So I was very assured!


And he’s done! Now moving on to the back of my hair to give it a straighter cut that will last till my hair grows long.


Here’s the back before Raymond worked on it.

Obviously I can’t see how it looks like when this photo was being taken! 😀


Ooooh what’s happening? Raymond working his magic.

After about half an hour or so…


I’m done! 😀 Yipppeee!


I began snapping selfies of my new hairdo immediately. Was so excited to show you guys the before and after!

Since buddy Shannon was done as well, we decided to share our selfie fun together too.


Me in my red ombre + Shannon in her dark purplish tone.

It’s a little difficult to see any colour on her as it was a really dark shade. But it’s more obvious in real life! 😀


Take One, Take Two!


Another one from us. Thanks for the photos, girl!


Another selfie just before we left.


I know, I know… you’re probably wondering where the before and after is.

Here it is again:


Yes, it’s the same person – only with a different hairdo!


There’s more! I figured that the full frontal view wouldn’t suffice for my curious readers. 😀 😀 So for easier comparison, I snapped it from all angles – left, right, back & front to put in a collage.


 BEFORE


 AFTER


I love it and enjoyed my session.

Thanks Raymond, for a beautiful haircut and a very nicely done colour!

If you want a friendly, helpful and informative stylist like mine, look for Raymond.


As always, thank you very much, to the team at A Cut Above!


Rest assured your hair will always be treated with utmost care and precision.

You’ll certainly be in good hands of these professionals with each visit.

 ———————————————————————————————————-

To book your hair appointments or for more information on A Cut Above, you can:

Call them at their salon via their contact number: +603-2283 3131

Log on to their website at: acutabove.com.my

They are very active on social media too!

Like their Facebook page at: fb.com/acutabovegroup

Tweet them on Twitter at: @ACutAboveGroup

Follow them on Instagram at: @ACutAboveGroup


Share:
Page 2 of 7«1234»...Last »

Oh, hello there!

Hi! Welcome to TheJessicat.com - an urban lifestyle blog established since 2005, written from the perspective of a Malaysian blogger. Discover the latest and all that the city has to offer! Do bear with her occasional rants & musings though. Happy reading! ❤

Your ad here

nuffnang promoted content
proudduck: Mommy Guilt
nuffnang promoted content104,253 views

Sponsors & Affiliates

Follow my stories on Instagram!

Archives

This error message is only visible to WordPress admins

Error: No connected account.

Please go to the Instagram Feed settings page to connect an account.

Copyright © 2005-2017 | TheJessicat.com | All Rights Reserved